Die and clear level
sent in by Curtis Armstrong
If you want to see something funny, go to level 14 "No time to Paws." When you get to the end, don't touch the Yarn Marker which lets you finish a level. Instead, go up using the Ledges. Get to the top and Run and Jump to the right while Gliding. Go forward until the screen won't scroll anymore, then release the Glide Button and put Bubsy in the middle of the screen. Bubsy will touch the Yarn Marker and go SPLAT! He will die but the level finished music will play. He will try to walk to walk off the screen to the left but will stop about halfway there and will walk in place. The screen will go black for a little bit and eventually, you go to level 15 as usual.
Odd death glitch
sent in by Curtis Armstrong
Go to any Village Level (1, 2 or 3) and go to a Bridge. Extend it if neccesary and fall off while Gliding. Control youself towards the bridge. If this is done correctly, Bubsy will do his usual water death sequence but he'll be stuck on the Bridge! At the point at when his legs are supposed to come up from the water and sink back down, he will vanish! His legs will float in Midair, then Vanish! Odd.
Messed up image
sent in by Curtis Armstrong
When you start level 2, or any Train Level (7, 8 or 9) hold L as you start the level. Most of the time, a messed up image will appear there, though you can't interact with it. It won't work when you press R though. But it does work when starting on a Checkpoint.
Die and clear level 2
sent in by Curtis Armstrong
Remember Die and clear a level? Guess what? IT'S BACK! This one is extremely difficult however. Go into Level 5 "Night of the Bobcat." Make your way to the end. Once you see the yarn marker, backtrack a little and go back to the Pizza House. Over it is a Checkpoint. Hit it. Go into the Pizza House and grab the Extra life. Now, kill all the surrounding enemies. Now it gets tough. Go back over the Pizza House and run forward. Hold down B and try to land on the Strongman Booster. If you do this corrrectly, Bubsy will shoot into the air. As he gets to the top, hold Y to guide him to slow his fall for a while until the screen stops to scroll. Quickly release Y and position yourself in the EXACT middle of the screen. If when Bubsy lands and gets flattened, no yarn balls come out, you've done it.
Die and clear level 3
sent in by Curtis Armstrong
Yet another Die and Clear level! For this one, go to Level 10 (Beverey Careful). At the end, is an Egg-Throwing Woolie. DO NOT KILL HIM! Ignore him and go to the yarn marker but don't touch it! Hold L and walk over a little until the Woolie appears on the screen. Let him throw some eggs, then WALK over to the yarn marker and finish the level, make sure no yarn balls come out. Now just walk into an Egg, and Bubsy will break into pieces as your score starts to add up. The same old "Lingering Black Screen" happens.
Die and (Not) clear level
sent in by Curtis Armstrong
Go to level 12 "Claws For Alarm." Once you get to the boss, wait until it almost completely destroys your raft. Now, jump on it when the yarn ball on top of the flying saucer opens. Hold down Y and B and destroy him. If you're lucky, you'll kill him. Now, keep on holding down Y and B and press left and right rapidly, but not too fast! If you do it right, instead of Bubsy dancing when you land, you'll be able to control him as your score goes up! Now jump into the water. Then, you're done. However, in this case, you'll have to replay the level from the last checkpoint.
Chrono Trigger
Music glitch
With the epoch hop in it and you will hear the
epoch music then hop out and hop back in quickly. If you did it right
you will hear the land music. (It helps if you think that the epoch
music is stupid.)
Goods For Free
Go to the hunting grounds in 65 million B.C. and wait for it to start
raining. Once it starts raining find the Nu but don't attack. Try to fight
the Nu after it stops raining, but before the Nu dissapears. If all is done
right he'll ignore you and run away. Next you hear him scream as if a battle
had been started. You'll then get all the trading items you get for beating
him up, but without a fight this time.
Oversight
I don't really feel right calling this a "glitch", but more of an
"oversight" on Square's behalf. Keep in mind that this is full of
spoilers, so for those of you who haven't played Chrono Trigger...
what are you doing?! Go dig up an old copy and play it!
Anyway, after the Epoch obtains its wings and you fight (or don't
fight) Magus, there are a bunch of sidequests you can participate in,
but there are really only two endings you can open up any more (and
they're similar enough some may call them just one ending). Each of
these sidequests alters the ending in some way (for instance, if you
save Lucca's mother then she'll be standing, else she'll be sitting
down because her legs have been crippled.) Two major factors in the
ending are whether or not Crono is in your team, and whether or not
Magus is in your team. But, as it turns out, whether or not ROBO is in
your team makes no difference; he'll appear with the other playable
characters anyway. So how can you be this far into the game without
Robo? Simply do half of Fiona's sidequest: leave Robo with Fiona in
600 AD but don't come back for him in 1000 AD. Then, defeat Lavos and
Robo will appear in the ending, without any explanation of how he
returned.
Another odd thing is, if you kill Magus, Frog is SUPPOSED to be human
at the end, but if you don't resurrect Crono and you crash the Epoch
into Lavos, he stays a Frog. Make Rust Tyrano's body vanish!
When you are just
about to fight Rust Tyrano, keep going in and out of
the status menu, while you are doing this, walk over to
the side of Rust Tyrano (Which initiates the
battle). If you managed to do it correctly, you'll only
be fighting the head of Rust Tyrano!
Black Hole glitch
There are centain things you must
have set before you can make the glitch work-
- You must have Magus in you fighting party.
- Magus must know the Black Hole tech.
- The monsters must still be in the General Store and
Inn. (Well, not both, at least one of them.)
- You must have not completed the Ozzie's Fort
sidequest.
If you have those critera met, then save and go to
Medina village. Enter either the Inn or General Store.
(You get more interesting results if you do this in
the General Store.) Now, assuming you went to the
General Store, talk to the Hench behind the counter, and
plead, doing this will start a battle. When the battle
starts, have Magus use the Black Hole tech until both
the Hench and the Omnicrone are sucked in (You
actually only need to suck in the Hench.) after the
battle, the Hench's position will be screwed up, this is
from the Black Hole tech 'pulling' him foward. You can
plead to the Hench again, if you want to move the Hench
around some more, change Magus' position around, if you
goof around enough with this, your people may
eventually be behind the counter themselves! It's a
very intersting glitch, I should say... Exit anywhere
You don't exactly exit anywhere, but
anyways, start to exit an area, when the screen starts
to fade quickly go into the status menu, then exit, you
have just seconds to moves in another direct, then
immediatly go back into the status menu, you can repeat
this as often as you like, though I haven't really
found anything all that interesting with it... This
glitch sounds complicated, but it works.
Glitched up palette
Sometimes when you put a Poyozo
Doll on the pedestal in Proto Dome, its palette will
look all messed up.
Mess up Robo's position in Proto Dome
If you
noticed, on the second floor of Proto Dome, there is a
switch that Robo jumps up to remove the energy
barriers guarding a Megalexir, leave this switch
alone. Once you get both of the Poyozo Dolls, try to get
in a position, where Robo will jump up and hit the
switch, if you managed to do it correctly, Robo will
jump at the switch while Atropos approahes you. After
Robo hits the switch, everyone will be all bunched
together.
Lavos Spawn's eye only
Believe it or not, you can
actually destroy the shell of the Lavos Spawn, what you
need is the Bronze Fist for Ayla (she gets it around
level 90 or 95.) If she gets a critical attack,you
always do 9999 damage. Now keep having Ayla attacking
the shell, eventually she'll get a critical and DESTROY
the shell! It looks very funny seeing just an eye.
Skip monsters in Magus' Castle
In the room where
monsters come out of the statues, you can walk behind
them, like this-
Phantom Rain
In the Hunting Range there are two tricks you can do
to see the rain when it should not be there! 1. If you
manage to battle an enemy other than Nu while it's
raining the battle will have a dark-blue tint and if
you get a Critical Hit you will see the rain during
the flash! 2. After the rain goes away right as the
screen is about to brighten up go into the Menu Screen
and go out. If done right the rain should stay after
the screen brightens up, but disappears if you use the
Menu again. This can be combined with the first trick,
but the battle won't be blue.
Donkey Kong Country
(I originally sent this trick to Dirk Wegener's
SMK/SNES page back in 1996, but his page is no longer up. I also sent these
photos to Nintendo without explaining how I do the trick. They still have
no clue how I do it to this date!)
Take Rambi into other levels!
If you want to take Rambi into other levels, you
must do tricks 1 and 2, and then choose either 3a (easier) or 3b (harder).
Trick #1: Split up Donkey and Diddy and control
both at the same time
First, go into Oil Drum Alley, break the midway
barrel, and exit. Now go back into the level and go to the left until you
see a blast barrel that would normally take you up above the tall platform.
Make sure that you have both Donkey and Diddy, and have Donkey selected
as your main character. Now here is the tricky part: Try to stand on the
edge of the platform with the blast barrel, but try not to touch the barrel.
Face the left, so that Diddy is standing inside the barrel. Now quickly
switch your characters twice in a row. The timing of your switch is critical
and will require a lot of practice. If everything is done right so far,
you will see both characters blast out of the barrel about one second apart
from the other. If this happens, hold right on the controller to make sure
that both characters make it over the tall platform.
Now you will notice that you can control BOTH
Donkey and Diddy at the same time! In other words, whatever you do to control
Donkey will also affect Diddy. For example, if you make Donkey jump, Diddy
will also jump at the same time. One thing you will notice is that Diddy
runs faster than Donkey, so if you want Donkey to catch up with Diddy,
press down to make both characters squat, then execute a hand slap with
the B button, and hold the controller diagonally down in one direction.
This will allow Donkey to stay in one spot and Diddy to do a cartwheel
in whatever direction you want. Be careful not to let either character
fall into a pit, or they both will die. The really cool part is that Diddy
is invincible to all the enemies! A lot of weird things can occur as a
result of this trick, so have fun with this one! I should mention that
it is possible to split up Diddy and Donkey on other levels, such as Barrel
Cannon Canyon, but if you want to take Rambi into other levels, you must
do it in Oil Drum Alley as stated above. Trick #2: Rambi weirdness
Once you have managed to accomplish the above
trick, head to the right with both characters until you find the crate
with Rambi inside. Make sure that you never let Donkey get hit, and never
swap characters with the A or Select button. If either of those things
happen, you'll have to start the trick all over again. Now make sure that
only Donkey goes down into the small area where Rambi is, and try to keep
Diddy on higher ground nearby. Now make Donkey jump on Rambi, jump out
of the area with the tire and head right. Get rid of Manky Kong with either
character. Remember, you have two characters that can attack, and Diddy
is always invincible! If Diddy accidentally falls into the small area with
the tire, he will not be able to get out on his own. If this happens, have
Donkey and Rambi jump over that small area, and then press A to send Rambi
down to Diddy. Then make Diddy jump on Rambi and jump as high as you can,
and then press A to make him jump off of Rambi's back. That will give you
enough height to get out.
Here's another useful tip: If one character is
riding Rambi and the other isn't, you can press diagonally down on the
controller to make one character stay still, while the other one can move
at his own free will. If you accidentally make both characters jump on
Rambi at the same time, some really weird things will happen, and that
is a separate trick, which I'll explain later. That could mess up the whole
trick, so don't do that if you want to take Rambi into other areas. Trick #3a: Take Rambi into other levels using
the Donkey Kong method If you have managed to do everything above correctly,
you are now ready to take Rambi into some other levels! After you have
taken Manky Kong out, you can take Rambi into other areas in two ways:
the Donkey method and the Diddy method. The Donkey method is much easier,
so I'll explain it first. Make sure that Donkey is on Rambi and have Diddy
nearby. Make Diddy fall into the pit, but make sure that Donkey and Rambi
do not fall. You will lose a life and exit the level. Now go into any level
that normally has animal goodies in it, and take a look: Donkey is riding
Rambi!! This works on EVERY level that has an animal buddy inside, even
the water levels! Be careful in the water levels though, because if you
fall through the corals, you'll be completely stuck somewhere below the
level. For some unknown reason, Rambi can also be taken into Reptile Rumble
even though there is no animal buddy in that level. Have fun with this
trick!
Trick #3b: Take Rambi into other levels using
the Diddy method
This trick is the alternate way to send Rambi
into other levels, but it is harder to do. Do everything in tricks 1 and
2, but this time, have Diddy ride on Rambi and make Donkey Kong fall into
the pit instead. You will exit the level and lose a life as usual. Now
go into any level that has an animal buddy in it. You will notice that
Rambi doesn't seem to be there, but he is actually "hidden" with Diddy.
You will need to find a bonus area, but make sure to switch characters
just before you enter the bonus area. If everything goes well, Diddy will
be riding Rambi when you come out!
If you want Diddy to ride Rambi in a water level,
you will need to know what kind of medallion is in the water stage, and
collect two of them before you even start to do tricks 1 & 2. For example,
if you want Diddy to ride Rambi in Coral Capers, you will need to collect
two Expresso medallions before you do any of the tricks above. Now swim
through the level as usual, but try not to get hit. Just before you collect
the medallion in the level, switch characters and then collect it. After
you finish the bonus stage, hold down and right on your controller until
you see Diddy, Rambi, and Donkey appear. If you forget to hold down and
right on the control pad after completing the bonus round, you will be
stuck forever, so make sure that you do that. Now you can have Diddy ride
Rambi in the water levels! Other tricks that can be done as a result of my
splitting trick (Trick #1)
If you have successfully accomplished trick #1,
try to make both Donkey and Diddy jump onto Rambi. Now you will have two
Rambis! As you explore through the level, you may undergo some really weird
transformations. Check it out!
If you have done tricks 1 and 2, try to start
using trick 3b, but instead of going into a bonus level, just press the
Select button once to switch to Diddy. Now see if you can control him,
and watch some of his weird transformations. I've had Diddy turn into Klumps,
Mini-Neckys, Rambis, Winkys, Expressos, and even barrels and oil drums
just to name a few! One word of The following photos come courtesy of redslime:
Fly in Mine Cart Carnage
First you need to go through the stage and get
the Continue Barrel, and then jump down a hole or get hit. While you begin
come out of the continue barrel, rapidly press Y and then B in a rapid
sequence, as if you were rolling and then jumping really fast. When Donkey
or Diddy comes out of the barrel, they will be performing rolls and then
jumps over and over in the air which causes them to fly!
More Rambi weirdness
Here's another trick I found a while back. It's
loosely related to my more complicated Rambi glitch, but this one is much
easier to pull off.
First go into a course that has an animal buddy
in a bonus area. Collect an animal buddy either in the main level (if there
is one) or get one from the bonus stage and exit. Now go back into the
bonus stage while riding the animal buddy. Get on the animal buddy inside
the bonus stage once again, but jump off this time, and then leave. Once
you exit, you'll be riding Rambi! Try it on Bouncy Bananza and Orangatan
Gang for easy results.
Warp glitch
I believe this was actually featured in a Nintendo
Power article, but we were playing with it long before that issue even
appeared. In the very first world, when Donkey and Diddy are wandering
around the map, there is a section right before you enter the right half
of the world where the path they walk on (the dotted lines) has several
corners...I actually believe it is right after Cranky's house. Well,
as your character passes over these corners, you need to pretty much mash
the A, B, and Y buttons, as well as the L and R buttons....heck, just hit
EVERY button, and, if timed right, the screen will fade out. When
it comes back in, you'll come out of a barrel in the middle of a stage
in the middle of the third world! This trick always seemed to work
best when I only had one character (I.E. Diddy, no Donkey; Donkey, no Diddy),
and it can also be performed (with different results) wherever there is
a corner on the map screen.
Enguarde weirdness
There is a water level that has barrels that shoot
you along to where you need to go. Now, after the section with the
barrels, there is a crate containing an Enguarde (swordfish). Now,
you hop on Enguarde, and slowly, carefully, make your way back to the last
barrel you popped out of. You need to be careful, because you need
to BE ON ENGUARDE. Now, just simply enter the barrel with Enguarde,
and, voila! There are several strange things that can be done with
this... one, your characters act as though they were on dry land, walking
around instead of swimming...two, the colors change and things just plain
get funny... and, finally, three, you can play the rest of the level as
Enguarde, with no character riding, and no character following behind.
It's kind of fun, and kind of interesting... just give it a try.
More Enguarde weirdness
Go to Coral Capers and get rid of
Diddy by having him get hit by an enemy. Now get Enguarde (don't break any DK
barrels along the way, or the trick will not work) and go over to the place
where the Croctopus swims in circles in the area with the 1-Up Balloon on the
right side. Go over to the top left of the square, lined up with the DK
Barrel to the left, and deliberately get hit by the Croctopus. This will send
Enguarde flying. Now watch Enguarde as he swims back and forth. Positioned
directly above the DK Barrel, time it so that you break the barrel at exactly
the same time that you get back on Enguarde. Result: As the DK Barrel is
breaking to release Diddy, Donkey turns blue for a short moment.
More side effects from the Rambi glitch
First you go to Oil Drum Alley and do the trick that enables you to control
DK and Diddy at the same time. Then take both monkeys to the next oil drum
you see. Have DK stand to the right of the oil drum and hold left. Diddy will
run to the left through the oil drum and off the left edge of the screen
while DK cannot go through the oil drum and stay where he is. If you hold
left long enough, your life counter will appear on the screen (which means
Diddy fell into a pit and you are losing a life). Before the screen fades and
you are returned to the Kremkroc Industries map screen, have DK step on the
flame coming out of the oil drum. If done right, DK will be hurt and Diddy
will teleport to where DK was, even though it counts as if he fell into the
pit and died. A life will be subtracted from your counter. Now, the weird
part is that your life counter will stay on the screen and will not disappear
until you leave the stage.
Now here's a cool one: Do the Diddy version of the Take Rambi To Other
Levels glitch. Take Funky's Flights back to Jungle Hijinxs when you appear on
the factory map screen. Once there, kill all the enemies before the Continue
Barrel with DK. Then switch to Diddy. When you move him around, all he
usually does is slide around unable to jump. When you are like this, hit the
A button. This will put Diddy's control back to normal as well as screw up
his colour palette. Now hit A again to switch to DK. DK and Diddy should now
both have normal colours. But wait, something else is messed up. The bananas,
banana counter, and life counter should all be darker in colour than they
should be. Weird.
Take Expresso all the way through the Orangutan Gang stage to the end.
Stand at the top of the cave at the end until you are off the top right
corner of the screen. Now try pressing the A button repeatedly. Periodically
climb down the hill to see if anything has changed. If you're lucky, you'll
screw up Expresso's colour palette. Keep doing it and DK or Diddy (whoever is
in the front) will also have screwed-up colours. Now for something weird:
Take your messed-up Expresso and Kongs back in the stage. The bananas may
have messed-up colours. If they don't, jump off Expresso's back and you could
make the bananas in the stage turn silver! Metal Donkey Kong
Get Rambi in the first level. Take him all the way back to the beginning, get
off Rambi, take the
metal barrel (it's in the ground) and throw it against the wall, then quickly
hop on the barrel and
hold Y. When you pass Rambi, press B (while still holding Y) and you should
get on him. While
holding Y, have Rambi kick the barrel away. Then let go of Y, and you will be
riding a metal Donkey Kong!
Here's a photo of this glitch, courtesy of Nick G.
Death Glitch
This is a cool glitch, but don't do it if you don't like to be killed. Go to
Tanked Up Trouble (in
Chimp Caverns, I think) and get to the half way point. Now, make sure Diddy
is your lead
character at this point. Remember, you can't change characters while on the
moving platform
thing. Get the first two fuel barrels after the halfway point, but IGNORE the
third and fourth.
Don't even try to get them. After the fourth barrel there should be a
platform. Stand on the right
edge of this platform facing right. After a while the platform will run out
of gas... and Diddy will
throw his hat off the ledge, then jump off the ledge himself! Kinda funny,
even though you lose a life for it.
Donkey rides Diddy, and vice-versa!
Ok, you have to go to Elevator antics, and get to the half-way barrel. Keep on heading right, until you get to a metal
barrel and a moving platform with a high wall to its right and a bee between you and the platform. Pick up the barrel,
jump onto the platform, and throw the barrel against the wall. Your character will be ridding an invisble barrel, and be
stuck up against the bottom step on the left! If you have both characters, Donkey will be riding on Diddy, or Diddy
will ride Donkey!
Major life counter glitch
This trick will allow you to have a NEGATIVE number of lives! It really isn't
that difficult to do, you must know two tricks: (1) The Mine Cart Carnage
Shortcut-- jump off the course at the beginning and fall down the left side
of the pit to warp to the end of the stage, and (2) The Split Up DK and Diddy
Glitch.
OK, let's explain how to do this. First, you stand right next to the Barrel
Cannon with both DK and Diddy. Then, do the split up trick, and IMMEDIATELY
jump over the barrel and down the left side of the gap with DK. What happens?
Diddy overshoots the mine cart and loses a life while DK takes the shortcut.
A life is subtracted from your counter, but, you see, the game didn't have
time to take you back to the Monkey Mines map screen because DK interrupted
the 'life loss' sequence by warping. This causes you to LOSE A LIFE AND
CONTINUE PLAYING!! After you warp, you get Diddy back, who fell down the pit
earlier. This is a lot like my Oil Drum Alley glitch that caused your life
counter to stay on the screen for the rest of the level.
So how can you have a negative number of lives? Simple. If you have no lives
in reserve and you do the glitch, the 'zero' on your life counter will
disappear, but the game doesn't have time to display the 'game over' screen
since the sequence was interrupted by the warping. But if you lose a life
when your life counter displays no number, the Game Over sequence displays
like normal. Moreover, after you have no lives you can still do the trick
over and over! Say, after you have 0 lives and do the trick you have "-1"
lives, meaning a 1-up balloon will restore the zero. But when you have "-1"
lives and do the trick again, you have "-2" lives meaning it will take two
1-ups to get the zero back. With trial and error it may be possible to
discover the MINIMUM number of lives you can have!! Diddy Misses His Hat
In the Millstone Mayhem stage, go to the second or third bonus stage and lose
on purpose. With Diddy in the lead, quickly jump to the slope on the right.
If you time it right, Diddy will take off his hat on the slope, and try to
jump on it, but miss it as he slides down and lands on the ground at the
left. This is very funny to watch.
Take Enguarde to other levels?!
I've accomplished to take Enguarde to other levels with animal buddies,
that's right! And not only that, the glitch make the kongs act as if they
where on a watery level when in fact they are on plain land, i.e you will
swim in the air!!! That thanks to Ryan Murray's glitch on your page!! And
just like your glitch, this glitch has a lot of weird side effects, like
turning the Kongs as well as Enguarde into winkys, oil kegs and barrels plus
changing their colors to gold/blue/black etc..
INSANELY fast way to get 1-ups!!
In Elevator Antics, get to the midway barrel, exit,
and come back in with Diddy. Run to the right until you see a Klump on a
platform just below you. Wait until the Klump gets close to you, then fall
(not jump) onto the Klump by pressing right. Do this a couple times in a row
quickly, and then execute a cartwheel with the Y button while the Klump has
his hands over his head. Wiggle the control cross rapidly left and right so
that your cartwheel maneuver stays "inside" the Klump. Meanwhile both Diddy and
the Klump will be "invincible" to one another. Depending on how long you keep
this going before the Klump dies, the game will think that you had cartwheeled
through TONS of enemies. As a result, your lives will skyrocket very
quickly! I've had over 50 lives just from one cartwheel! See how many you can
get!
Destroy the background
To "Totally destroy the background" of the stage "Ice Age Alley", go
left at the start and get Expresso. Next, fly until you get to the point
where you see 2 Neckys. Get off of Expresso and bounce of the Neckys to
Bouns #1. Grab Expresso and exit. Then, go left and try to jump up the
cliff. After jumping up, make you way back to the start to where the
OTHER Expresso's cage was. Now proceed through the level as normal.
You'll notice that the snow won't stop! Keep going and when the sky is
supposed to turn blue, it turns Purple! And when it turns blue, the
background is totally destroyed and it looks like you are in a freezer!
The strange part is how the foreground remains unchanged (unlike other
codes) and the background is hit with the Glitch!
Teleport from Oil Drum Alley to Jungle Hijinxs and back again!
This is a sort of an extension to the Take Rambi into other levels glitch.
This is very tough to do and it needs perfect choreography, so listen well.
First, go to Oil Drum Alley and do the split-up trick. Now go and get Rambi
and have Donkey mount him. Take both Donkey and Diddy to the right until you
reach a set of stairs with two blue Kremlings bouncing on it. At the top of
these stairs youll see a metal trapdoor on the floor. Have both Diddy and
Donkey+Rambi stand on this trapdoor. You MUST be on the trapdoor or else the
glitch wont work. Now jump straight up and Diddy will mount Rambi in
mid-air. Now you have two Rambis; a grey one (Donkey) and a brown one
(Diddy). IMMEDIATELY after you hear Diddy mount Rambi, hold Y and Right in
mid-air. The grey Rambi will land first. When it does, IMMEDIATELY do a
running jump onto the Mankey on the right. The brown Rambi will miss the
jump, fall down the ledge, and continue running along to the right. Have
both Rambis keep running to the right NON-STOP. The grey Rambi MUST be ahead
of the brown one. You should reach a second trapdoor just in front of the
hidden door and youll also see a flaming oil drum lingering in mid-air.
Just as the grey Rambi reaches the trapdoor, do a running jump up to the oil
drum. If all goes well, the grey Rambi will hit the flame from the drum, and
youll hear the hidden entrance found tune play. Then youll be dragged
into the bonus game as usual. Whats weird is that as soon as you exit the
bonus game, youll burst out of Donkeys hut in Jungle Hijinxs! If you want
to go back to Oil Drum Alley, just press start + select and youll teleport
back!
Freeze the scrolling
I discovered this glitch while i was sitting in my room trying to do the
"Split up Donkey and Diddy and control both at the same time" glitch.
First go to Oil Drum Alley, break the midway barrel,and keep moving
until you reach the next hole(It looks like it is one of those holes
that would normally kill you but it doesnt). Drop down in it and there
should be a Rambi. Hop on Rambi with Donkey (you should have both of
them, Diddy and Donkey) and go left until you reach the area where there
is a blast barrel that shoots you up to the platform above.(This is the
place where the Split up Donkey and Diddy cheat is performed.) Now stay
on the platform to the right which is above the blast barrel. Then jump
to the left a little and drop Rambi on top(you got to make Rambi land
close to the wall so when you jump you will land on him) of the blast
barrel but make sure you make it back on the platform you were just on.
Next with Donkey jump down to where the blast barrel is and turn right
in the air so that you are hugging the tall wall so when you land you
should land on Rambi and be shot up from the blast barrel (Press right
when you are shot up so that you land on the tall platform). This
freezes the screen and now when you move you will be moving off the
screen (the screen wont be scrolling with you.) You will hear Rambi's
foot steps but wont see him if you go off the screen. This is another
cool thing you can do while you are off the screen. Go to the right for
as long as you want because the longer you go, the better the next part
looks ( oh and jump a few times so you go over the barrels.) One time i
went for like 20 seconds and i kept jumping and it made me lose a life.
Then get off of Rambi(press A (I think but im not sure if thats the
button so just try to remember the button that lets you jump off of
Rambi.) Now try to (sometimes its hard to get back on him) get back on
Rambi. If you accomplish this you will see the screen scroll (it looks
REALLY REALLY COOL) to where your character currently is. This glitch is
not hard at all to do. I did it 10 times before sending it to this
site. (This is not the glitch) I'm still trying to do the Split up
Diddy and Donkey trick which is like REALLY HARD to do. I did it twice
but donkey was too slow and he died. If there is any other EAISER WAY
to do this trick PLEASE tell me. That is all I wanted to tell you. Hope
you gamers enjoy this one!
Freeze the screen
In Croctopus Chase,
I was able to have Enguarde with me all the way in the level. He
appears close to the end of the level, which made
me really dissapointed. So, I wanted to have Enguarde with Donkey and
Diddy. Here's how you do it: before you
enter the level, you need to have two Enguarde Tokens ready. Enter the
level as usual, but DO NOT GRAB ANY
OF THE FOLLOWING ITEMS: the KONG Letters or the Winky Token (I'll
explain later). Stay away from the midway
barrel as well or you will be unable to bring Enguarde to the
beginning.
Now here comes the prequel to the glitch: Like I said, DON'T TOUCH
ANYTHING, especially the midway barrel.
Find Enguarde and take him to the place where you'd find the Enguarde
Token (Make sure you have two tokens
ready). You'll eventually end up in a Enguarde-only Bonus Level. After
the bonus level is over, you'll teleport back
to the BEGINNING of the level with Enguarde on your side.
Now comes the glitch. I don't know how it works exactly (I did this
once), but when I reached to the barrels, I did
some funky things, like trying to split up DK and Diddy in the water.
You can't do that! One time, I was able to walk
in the water levels. However, when this glitch is performed, the
screen will be unable to scroll, forcing you to reset
or press Start+Select.
The reason why you are not allowed to grab the mentioned items is
because you can lose them. If you grab
at least two of the KONG Letters BEFORE you touch the midway barrel
and you end up grabbing a token (in
this example, you had two), you'll lose the KONG Letters when you exit
the bonus round. The midway barrel
acts like a Save Point: the bonus levels you found and the levels you
have beaten are saved. If you don't save
the game, you could end up starting the game over from scratch.
Besides, the Enguarde Token is the closest
token you can get to. THE way to get 1-ups quickly!
This is even better than the Elevator Antics trick! Go to Manic Mincers.
After the Continue Barrel, you'll soon see a Krusha walking back and forth in
a "pit". This is where the first Bonus Area is. Stand above where you'd break
open the hidden door, and wait for Krusha to get on the far right side of the
pit. Walk off the edge and fall on his head, and starting holding Right.
You'll continue to bounce up and down on him rapidly, and you will get MANY
extra lives quickly. You will be maxed out in less than a minute.
Blow up a TNT barrel with another
Go to Millstone Mayhem and switch to Donkey Kong
(if you haven't). Stand between the two TNT barrels and throw one
after the other as quickly as you can. This is
very tricky to do because it takes a lot of practice and perfect
timing. You may need to readjust Donkey Kong
to do this right as well.
From Bonus Level to the "inner" caves
Make a trip to Slipslide
Ride and enter the third bonus level. When
you exit, go back to where you found it and jump over the wall with
Diddy to the right. This really looks weird
because (a) you are actually in the "inner" part of the cave; and (b)
this glitch almost looks like the glitch in
Super Mario World in comparison. Now, be the detective and answer this
question: why didn't I tell you to take
the left route? Your answer is just past the Continue Barrel.
DYDDY glitch
At the screen when Crankey is using his music box, do the DYDDY code, or
press DOWN, Y, DOWN, DOWN, Y. That code lets you play the bonus games.
If you do it after a game over in a saved game, you can continue with
all the lives you earned there if you hit START and SELECT in the cave!
However, the secret cave has a glitch. Collect 2 of any token, and
collect 3 of another to enter the bonus game for that animal. When you
come out, go to the tokens you have 2 of, and jump right towards the gap
between 2 of them. If you collect 2 at once, the token status for that
token will appear but with only 1 token. After the beep noise for a
single token, you go to the bonus game as usual.
Diddy loses his barrel!
First, you need to perform the Split-Up glitch (get the middle
barrel too) then begin to perform the "take Rambi into other levels
using the Diddy method." Re-enter the Oil Drum Alley level, and after
breaking out of the middle barrel, push A or Select to switch
characters. Holding Y, move Diddy right and push B to jump across the
gap, bypassing the Rambi area. If you're successful Diddy won't
actually jump but kind of "float" across. Walk up a little more then
push B to turn into a reddish metal keg! Run left when you see
Manky-Kong's barrel coming for you. Land on top of the Rambi box in
the pit, then wait for Manky-Kong's barrel to hit you. If all goes
well it should look like you've been hurt, but Diddy will turn
blackish, and a DK Barrel will pop out! What's even more neat is that
the DK Barrel is real! It's not just a graphics glitch! But be careful
because if you walk so you can't see the DK Barrel any more it will
disappear.
See an animated image of this.
Donkey Kong
Country 2: Diddy Kong's Quest
**SEVERE BUG**
The following trick could ERASE
your character data, so DON'T DO IT! Proceed with extreme
caution if you really can't resist. Don't say I didn't warn you!! Enter
Castle Crush with Diddy alone. Pick up the first DK barrel you find and
hold it up against a wall. Now drop it and pick it right back up. It will
break and you'll be holding air. Now throw the air. Depending on where
you throw the air, different results could happen. If you're lucky (I've
done this a few times), Diddy could morph into some weird things, including
Klubba! Usually the game freezes up and often the games get erased,
so DON'T DO IT.
See Cyan Glenn Guardia's photos of some results of this glitch.
Stuck outside an open door
I don't think this could help you in any way but
it is interesting still. Make sure you have both Kongs, then walk right
up to an open doorway or cave (or whatever) entrance to a bonus room but
don't walk too close or you will walk in. The best way I know of getting
close is to jump across to it, but release across before you land, then
without pressing across, just press 'Y' until you are as close as possible
to the entrance. Now press 'A' to team up then hold 'Up' and press 'Y'
to throw your buddy up. When your buddy is on his/her way down, press across
towards the entrance. Your Kong should start to walk into the bonus room,
but spin back out when her/his buddy lands. What happens now is that you
can't walk into that room, and you can't move off of the screen you're
on for about 10 seconds. Also, if you're at a place where there is a gap
at the bottom of the screen and you fall down it, whether or not it is
a bottomless pit, even if it was safe before, you will lose a life and
exit the level. A good place to try this trick out is at the two bonus
rooms up from the hook in Hornet Hole in Krazy Kremland. To immediately
unlock the screen (if you really can't wait ten seconds) just press 'A'
to team up again and that should do it, but it wont allow you to enter
the room. To re-enter the room you have to go a certain distance away from
it and then return. The distance required is not the same for all rooms,
and different directions require less distance than others, like in Hornet
Hole you have to go down quite far to make the room re-enterable, but you
only have to go up a little way, and in Pirate Panic in Gangplank Galleon
with the first room (the one with the message from K.Rool on the scroll)
you only have to go right to the small cannon in the background to unlock
it, but you have to go to the stack of three barrels if you go to the left
instead.
Ducking underwater
This trick is just about as useful as it sounds.
It works in any level with dry land AND safe water in it (something that
the original DKC never featured). Lockjaw's Locker in Gangplank Galleon
is a good example, but there are others. All you have to do is run off
an edge but before you fall off press 'Down' to duck, you should slide
off the edge ducking and fall down through the water as though it isn't
even there. You will stay ducking underwater for as long as you hold 'Down'
unless you press 'Y' or 'B' or get hit by something. If you press 'B' while
ducking, you will shoot back up to the surface and there will be no side-effects
like drowning or the bends. The ice cavern levels such as Arctic Abyss
in K.Rool's Keep are the easiest to do this trick in because you slide
further. Don't try this at the start of Slime Climb in Krem Quay or you
will lose a life. You can also do this trick in Lockjaw's Locker by ducking
just as the water starts rushing up.
Take Enguarde past sign
In Lockjaw's Locker in Gangplank Galleon it is
possible to take Enguarde the swordfish to the end-of-level target - past
the No Swordfish sign! This same trick may work in other levels and even
with other animals, but I have only tried it with Enguarde. Near the end
of Lockjaw's Locker, you will see two Shuri starfish, at the start of that
corridor there is a crate sticking up. Position yourself on top of that
crate, then while riding Enguarde let the first Shuri pass overhead and
let the second one hit Diddy's/Dixies head. Enguarde should swim right,
chase after him immediately and as the water recedes, jump onto the crates
and you should see him try to come back, but the water level drops
and he swims right again. Stop here but when he has been off the bottom
of the screen for 2 to 3 seconds give chase once more, you should find
him swimming on the crates back towards the No Swordfish sign jump on him
to stop him before he reaches it. This trick may take a while to perfect
because you only get one try per time you play the level.
Take Rattly past sign
In Topsail Trouble in Gangplank Galleon you can
get Rattly past the No Snakes sign. It is really easy - the hard bit is
remembering to do it. When you get to the Kruncha (blue, musclebound Kremling
that gets mad when bumped into), kill him and stand (bob up and down) on
the right hand side of the platform he was pacing on. Hold 'A' to charge
the super jump, then release it to super jump onto a higher platform. If
you did it right you will be just past the No Snakes sign. There is not
much you can do with Rattly from here, but it is (I suppose) still worthy
of mention.
Skip Enguarde
Beat Arctic Abyss without
becoming Engurde! You must be Dixie to do
this! While swimming by the morph barrel, hold down. You will pass
by the barrel and beat the zone as Dixie! I think it may work with Diddy
too!
Another way to pick up air
Start a new game and go
to the Cheat Code section (Highlight Two Player Contest and press Down
10 times). Enter the NO DK BARRELS
code (B, A, Right, Right, A, Left, A, X), and make your way to Mudhole
Marsh. In this level, you'll remember that
most of the DK Barrels are inside the treasure chest. Take one of them
and WITHOUT letting go of the Y button,
collide with an enemy. You'll see the DK Barrel pop out. Remember that
you are NOT letting go of the Y button.
If all goes well, you'll see Diddy or Dixie holding an invisible
barrel. I like Dixie's holding pose; just take a look at
it.
Strange sound effects
Go to the Toxic Tower level and before transforming into Rattly have your
character jump into the green toxic water. You should hear the sound effects
from the level 2 boss and other strange noises!
Sound glitch when visiting Kong friends
Just simply bring only ONE of the Kongs (Diddy
or Dixie) to a Kong Family Hut/Klubba's Kiosk. If you listen closely, you
should hear the sound effects from the character that isn't present (juggling
sounds if Diddy isn't there or gum chewing if Dixie isn't there).
Ice level tricks
In Arctic Abyss, it is possible to swim past the Enguarde barrel. You'll
just have creep along the floor. It sometimes works, sometimes doesn't...
but hey, that way it's a whole lot easier to get some of the bonusestowards
the end when the water level starts dropping again.
In Clapper's Cavern, if you hop off Enguarde in the swimming sequence and
then go back down after the water has risen, you'll find that the barrel
canyon still shoots you at the same friction as you were in air, ie. much
faster than expected. Boss glitch
If you go to the first boss with both kongs and press select to switch
between the kongs right before Krow hits the ground, the kong that was
in front will get frozen in the middle of animation and start
flashing. I did it with Dixie in front and at the end it looked like
she was hopping on one foot. Very funny.
Strange honey drip sound glitch
For some odd reason if you jump in the honey on the hive levels there will
be no "dripping" sound effect unless there is another sound effect in the
background (ex. like a bee buzzing). The reason this happens, I have no
idea!!
Color glitch
In Hot-Head Hop, go through the stage as usual. Make sure you get Squitter.
When you reach the No-Squitter sign, bring him up to the sign but don't go
past. Jump off and hit the end of stage target. Now, Diddy will have a
golden boom-box and Dixie will have an Orange and Yellow guitar. I haven't
tried too hard, but I haven't gotten this to work on any other stage, nor
have I found any other color schemes. A friend of mine pointed this out to
me, but I have yet to see any mention of this occurance online.
Donkey Kong Country 3
Screw up the blue balloon's color!
Go to the level "Bobbing Barrel Brawl" in Kremwood Forest.
NOTE: Before proceding, you must have not gotten the DK coin! If you have the
glitch will not work. So start a new game if you've gotten the coin.
Go through the level with Ellie until you see 2 red buzzes and a TNT barrel.
Kill the buzzes with the TNT. Go forward and kill the flying Knik-Knack. Then
go back and grab the respawned TNT barrel and set it down next to the barrel
that you throw in the water after Knik-Knack. Throw the regular barrel into
the water without the TNT barrel leaving your screen. Then, pick up the TNT
and jump across the barrels. Set the TNT down near that tiny wall. Jump over
that wall and kill the Krimp (the purple klaptrap) and don't let the TNT go
off the screen. When you grab the TNT keep holding Y to run. Jump up the
cliff where Krimp was and jump over the 2 red buzzes guarding the Steel Keg.
Then when you see Koin (He must have the DK coin still) throw the barrel at
him. It'll blow up and destroy those rocks under him that make the blue
balloon come up. But the balloon's color is screwed up! It looks like a gray
color with red eyes!! Here is a screenshot of it.
Cool huh? It's not much but like I said it is cool. Mess up Knocka's teeth
This one isn't hard to do and there are 2 ways to do it.
1st way
2nd way
Take Parry past sign
This can be only done in one level which is "Rocket Barrel Ride" in Cotton
Top Cove. You must have both kongs in order to do this glitch! Enter the
level and after you shoot out of the barrel that has the letter [N] above it
in the air, go right and hit the box for Parry to come out. Continue along to
the left passing the green buzzs as you go. Soon you'll come to a buzz flying
up and down and the normal way you're supposed to go above you. Dodge the
buzz and go right where you'll find two Krumples walking on a straight line
of bananas that're on the ground. Kill the Krumples with Kiddy. Stand in the
place where the second Krumple was, then team up, and throw Dixie in the air.
You'll enter the second bonus room. This bonus room was past the Parry sign.
Also, not that this bonus is easy enough, but it's now easier! Parry'll
collect stars for you! After you exit the bonus, you'll be where the steel
keg is with Parry! You're now past the sign. The only thing left is to exit
or beat the level.
Dodge Nibbla
In Bobbing Barrel Brawl and Kreeping Klasps, you can swim despite the killer
fish. It's not even hard, but harder than doing it the normal way, anyway.
Swim near the surface. Just as he is about to catch you, jump over him to
the left, and then quicly again over him to the right. This wiil confuse him
a bit and slow him down for a while.
The odd bananas
In Lemguin Lunge, just before the last lemguin slope, start instead quickly
running up&left along the terraced slpe. You might catch a glimpse of a few
bananas inside the snow...
Other two odd bananas can be found from Barrel Drop Bounce. After the first
barrel canyon, jump back down to the left, between the two leftmost
cascades. There's a few odd bananas jut floating there, for no reason. Secret platforms
In Tracker Barrel Trek, count how many cascades there are in total. (4 if I
recall correctly.) But when you're nearing the top, you'll go past one more
cascades! Jump down there just for fun. You'll be in some platform with a
backwards banana arrow at the right side. If you go and jump to the next
platform on the left, you'll now have a solid screen side where you came!
Now, when jumping across, turn back right in midair. iI you do it right,
you'll get on another hidden platform below the aforementioned. But if you
do it wrong... you'll die.
There are quite a few other secret platforms in Barrel Drop Bounce. The
first is after the 4-barrel gauntlet; drop down after going behind the
cascade. The other three are all up and left from here; two at the far left
side of the level and one below the cascade right after you get Parry. All
of these are armed with a barrel cannon to send you back. Complete Tearaway Toboggan on foot
You'll need both Kongs for this trick. When you start, switch to
Kiddy. Run and roll off the edge, so you roll into the Buzz below the
barrel cannon. Dixie will take over, temporarily invunerable, and
bounce into the barrel. The next part requires good timing and speed.
You need to do the next steps before Dixie's invunerability wears off.
Fire Dixie out off the barrel when it is facing south-west. Dixie will
land on the start platform, but she'll skid on the snow. Jump to stop
the skid, and then run towards the Buzz. Roll of the edge, and through
the Buzz (you should still be invunerable), and jump before your roll
ends (you should be in mid-air). Hover over to the platform with the
toboggan on it, and attempt to land behind the toboggan (too far, and
you'll land in it. As soon as you land, jump in between the toboggan
and the barrel cannon above it, and hover over the barrel. You can now
freely roam the entire level by foot. Surprisingly, there are no
problems with collision detection, so you will experience no problems
in making your way through the level.
Earthbound
Infinite uses of Rock Candy
What you have to do is have the Rock Candy item on
either of the two bottom slots on the inventory of any
character.Now if you use a seasoning while the Rock
Candy is on a bottom slot,it won't go away!You can use
this trick to gain insane statistical bonuses at each
level up!I've had Ness get more than 1000 HP with this
trick!
Equinox
Get into Level 4 Early!
Equinox is a game that's divided into many different
dungeons, but normally you can only move on to a new
dungeon once you've completed the current one. The
"spirit" of the current dungeon boss will block the
bridge to the next dungeon, and you must find and
defeat him to move on. However, there is a way to
bypass the Dungeon 3 boss spirit and go to Dungeon 4
(Atlena) early! You'll have to beat Dungeons 1 and 2
first to open up the way to Dungeon 3. Once you have
access to the area surrounding Dungeon 3 (it's a
desert area with cacti and giant purple eggs), walk
along the southeast coastline until you can see part
of the docks that connect to Dungeon 4. You'll notice
that one part of the docks extends out to a small
desert island. It is possible to leap over the water
and reach this island, although you may have to rotate
the camera a bit using L and R. This, for some reason,
shortens the distance between the mainland and the
island. Once you've reached the island, you can easily
walk or jump along the docks to reach Dungeon 4,
Atlena. This may be useful, if you wanted to collect
the weapon and spell from Atlena early, but
eventually, you'll need to go back and beat Dungeon 3
in order to proceed with the game, because you need
all 5 harp strings, which can only be gotten by
beating all five of the dungeon bosses.
Cheat With the Save Spell!
In the Afralona Dungeon, you'll get a Save Spell that
will let you save your game anytime, anywhere inside a
dungeon (except the boss room.) Equinox's rooms are
set up so that if you collect a Token in a room, then
die before leaving the room, the room will "reset" and
you'll have to collect the Token all over again. There
are some rooms, especially on the Ghost Ship, that can
be tough to get out of once you get the Token, because
the Tokens are hidden behind spikes or other obstacles
that are difficult to jump over or get around. So, as
long as you have the Save Spell and enough Magic Power
to use it, collect the Token, then use the Save Spell.
Choose to "End Game", then reload the file. Tah-dah!!
You're now at the entrance of the room, away from
danger, and you still get to keep the Token!
Afralona Warp Glitch
After you beat the first five dungeons in Equinox,
you'll be able to warp to the Afralona Dungeon.
However, I strongly suggest making sure that you got
all the weapons and spells that you need from the
first five dungeons before warping. Why, might you
ask? There's a chance that you could never come back.
When you're ready to go, go to the island near
Galadonia and take the warp to Afralona...Now, save
your game by entering an exiting one of Afralona's
dungeon entrances (just to be on the safe side.) Now,
go back to the warp you arrived on, and use it
again...If you're lucky, all should go well, and
you'll end up back in Galadonia. However, most of the
time, the game makes you reappear out in the middle of
the ocean!! There's no way to get back to shore if
this happens. Sometimes, a troll or bat may get stuck
out there, too, and if you engage in battle with it,
the battle will go as normal, but once you leave the
battle, you'll still be stuck in the ocean. This
happens so often, that I can't believe the gameplay
testers would've missed such a huge glitch! NOTE: Even
without this glitch, you won't be able to go back to
any previous dungeons once you board the Ghost Ship,
anyway, so be careful!
Eye of the Beholder
Zombie Party
This cheat practically makes you invincible! I can't believe the testers
would overlook this. It's very simple. Once you've gotten at least five
people in your party, get four of them killed. Now go to the Camp menu and
pick Options, and Drop Character. Drop anyone who is still alive, and you'll
have a party of nothing but dead people... but you can still play! Now that
everyone's already dead, you can't be hurt by monsters. If you've got a lot
of items, you can throw them at monsters by dragging them to the top of the
view window and releasing them. This makes it much easier to win the game, as
long as you don't run out of items to kill all the monsters that get in your
way. But it's cheating, so if you believe in fairness, don't do this trick!
Final Fantasy III
Item Glitch
Go to Zozo in the World Of Balance with Relm at
the bottom of your list and 3 other characters. Now walk around until you
fight those small green guys with the wrench in his hand and wait until
he does vanish on himself or anyone else that's an enemy in that round.
Now you have to be quick. Have Relm do sketch on the vanished enemy. Once
she is done RUN!!!!! After that look at your item list and be amazed.
P.S. may Terra
Falling Glitch
If you go to Duncan's house in the, "World of
Ruin", without Sabin, you can find one of the game's few glitches. When
you walk into the house, you'll find Duncan jumping. If you pause the game
while he's jumping, he'll restart the jump where he is. Do this long enough,
and he'll jump into the black space around the room.
Vanish/Doom glitch
Doomgaze can be a real pain, so can many of the
other bosses in this fine RPG by SquareSoft. So, for a good deal of the
bosses, you can use a glitch in the program to allow DOOM to function on
them. First cast VANISH on the desired boss. Then, while they're invisible,
cast DOOM. They'll re-appear then die. If this doesn't work you could substitute
DOOM with X-ZONE. Even then, this won't work on all bosses.
WARNING: If you use
VANISH/X-ZONE on Doomgazer instead of VANISH/DOOM, you'll never be able
to get the BAHAMUT MAGICITE.
Gain lots of items
First, go to the Veldt with Gau and Relm. Have
Gau leap onto an enemy and the battle will end. Fight a few battles (or
run if your Relm is too weak) and when Gau reappears, before he starts
talking, Sketch him and your game will glitch up! Of course, this will
probably either mess up your file or
delete it completely,
but you can get like 999+ of some items, plus items like the "Leaf" (Leaf
appears rarely, but I've seen other people get it before.)
More item weirdness
You can "glitch" the game by casting "vanish"
on an enemy, and then having Relm try to "Sketch" them. This works especially
well with Dark Winds. Using this trick on Dark Winds works 90% of the time,
but it's rumored tht it only works on some carts (Wierd, eh?). After doing
this, the screen gets all junky (Well YOU find a better term for it), and
looks wierd. Immediately hold down L & R to run from the battle. When
you escape, the graphics correct themselves, and everything looks as it
should, but if you check your items, you'll find you have a TON of stuff!!!
Lots of economizers, and Atma swords, among other things, but most noticably,
thousands of dirks. You get more than 99 because there are multiple places
on the item screen that have dirks in them, and when you use them up (Selling
them or something), it goes from 1 to 0 to 256 (Really wierd, eh?). Be
forewarned, though. This glitch may sometimes cause OTHER items to dissapear
(I found that Edgar's tools had all vanished after I had done the trick
numerous times).
Memory glitch
In Final Fantasy III for SNES, If you do the Lete River Level-Up trick
for a very long time, the game will lose a little bit of its memory of the
previous monsters that you've alredy fought.
Move through a wall
In the
Underground cave, the one inside that monster that eat's you (I can't
remember its name), in the room with the falling ceiling, if you time your
exit just as the ceiling falls, you'll move through the wall instead of
exiting the room. From there you can explore the darkness, but I haven't
found any benefit from it or any way to escape.
Final Fantasy: Mystic Quest
Easily defeat last boss
I found a glitch to use in Final Fantasy: Mystic Quest, for Super
Nintendo. At the very last boss, you can easily beat him just by
healing him over and over again. He'll die after being healed about 6
or 7 times.
Harvest Moon
Talking Love
Normally this game is designed to let a woman's
love for you to be raised by talking to her only once a day, but they weren't
very efficient in their programming, and took shortcuts. If you leave the
house, and then talk to her again, it will count. So just be sure that
you leave the house in between conversations. This is great for building
up relationships in a short time.
Dead-as-a-doornail livestock dealer glitch
Step 1: Plant enough grass and get enough money to buy a cow.
Results: When you arrive back at the ranch, some strange stuff occurs. Of
course, because you bought a cow, the livestock dealer will be waiting for
you in the upper-right corner of the screen. But, because you sold a
chicken, ANOTHER livestock dealer will come in from the left side of the
screen! That's right, there will be TWO livestock dealers!!! And that's
not the weirdest part. The chicken-livestock dealer will overrule the
cow-livestock dealer, asking if you want to sell your chicken. Say yes.
He'll say, "OK! I'LL TAKE IT WITH ME." Then he'll leave. Now try to move.
You're frozen in place and so is the livestock dealer that was going to
give you the cow! The game is completely frozen except that you CAN make
your sprite face different ways with the control pad, but he can't walk.
Also, if he's holding something when he enters the ranch, I don't think he
can throw it down. The cow-livestock dealer is frozen, and that's why I
call this the "DEAD-AS-A-DOORNAIL LIVESTOCK DEALER" glitch. Try it out and
see what you think!
(On a side note, I never did try to say "NO" to the chicken guy when he
asked me to sell it.)
This should not corrupt game data in any way. It didn't corrupt mine.
NOTE!: If you sell chickens at a certain time (I think it's fall of the
first or/and second year) then the wandering hawker will come instead of the
livestock dealer. I don't know if this will cause the game to glitch or
not, but I presume that it would, because afterwards the livestock dealer
comes anyway. I've never tried it. Illusion of Gaia
Not Exactly Fair
In the town of Euro, there is a shop in which
you can get lots of great free items! Unfortunately, you have to wait in
line to get it, and this can take up to five minutes. Of course you could
skip this altogether. When somebody goes into the shop, the people don't
all move at once, you can slip in between two as they move if you're lucky,
and cut out some of the wait time!
An Apple A Day
In Euro, after you've made the woman in the mayor's
mansion happy by bringing her enough apples, you can continue to pick up
apples. Why you ask? Each apple can be used as a health restoring item,
but the vendor will only let you have on apple at a time, just be sure
to pick up another once you eaten the one your carrying.
Kirby's Dream Course
Suicide glitch
When playing in 2P mode on the Kracko course,
make it to the second hole. When you start there, shoot a fly shot with
max. top spin over toward Kracko. If you do it at the right time, you will
hit Kracko right when Kracko is just finished and you will get knocked
for an 80hit combo and get knocked off the course. Perfect for killing
yourself.
Kirby Super Star
Odd glitches
1. On Kirby Super Star, on Revenge of Meta Knight,
if you call a Helper after you defeat Meta Knight and before you get on
Wheelie, you will be riding a messed up Wheelie/Helper.Also the music will
be muted for a couple of seconds.
2. Also, if you inhale in air while touching an
icon, you won't get the power. Werid glitch
On anyone of the games (other than The Arena, Megaton Punch, Samuri
Kirby, and Gourmet Race), Look for a warp star. Have a helper being
controlled by a person (or a computer, but it works better with a
person). Have the helper loose all its life, and have it flashing.
Jump onto the warp star, and the screen should scroll forever, and other
weird stuff will happen. This may only work in one stage, the castle
like place in Dyna Blade before the layers of grey blocks. I've only
done it once.
Walk on Air
Play the Halfmoon stage in Milky Way Wishes, and make sure you have the
Parasol ability. Switch to it when you get to the last section (where the
wind blows upwards), and hold Up to do Kirby's parasol float move. He'll
travel UPWARDS due to the upward wind, and if he hits a ceiling, you can
walk/run ON AIR!
Lawnmower Man
Teleport glitch
This must be done on the second side scrolling
level. If you gage the distance of your jump just right, you'll knick the
edge of the platform then fall of. When it teleports you back up, it'll
teleport to the platform you jumped too, not the one you jumped from like
it normally does, but you continuallly fall of teleport back up until you
turn it off. Note the elevator has to be on the other side of the place
your jumping over.
The Legend
of Zelda: A Link to the Past
And now one of the tricks you've been waiting for...
Beware that this explanation is long. You may
want to turn back before it's too late! :)
Important! - Read these first paragraphs first
to better understand what you are about to do, before you just dive right
into THE TRICK.
Brief summary:
Semi-technical explanation:
Setup required:
Once you've determined which slot you'll use for
the trick, you will need to get to the point in the game when Link first
enters the Dark World, but DO NOT collect the Moon Pearl! Once you
have arrived on top of the pyramid of Power for the first time in the form
of a rabbit, you should save your game there. Then save a SECOND time to
make sure this data does not get corrupted by the upcoming glitch. That
will be the key element that triggers a series of glitches which ultimately
will lead to game data corruption. THE TRICK!
Glitch #1: Swim as a rabbit
Get to the lower-right corner of the small dock
and then use the Mirror to warp to the Light World. Link will return to
his regular form. Now climb up the ladder and press A to use your Pegausus
Boots and run to the top of the screen and stop. Now face south (down)
and use the boots once again to charge into the lake. If you've done everything
correctly, you'll fall at an angle and land right onto the warp point that
you created. This will take you back to the Dark World, but now you can
swim in the water as a rabbit!!
Glitch #2: Attack enemies as a rabbit and walk
on water!
Now that you are swimming as a rabbit, go ahead
and reach the land surrounding the entrance to the Ice Temple. You will
be walking once again as usual. Now get back to the shallow
water and warp to the Light World with your mirror. As long as you end
up in deep water in the Light World,
you will be ready for this next glitch. Otherwise, just find a spot that
is shallow in the Dark World and deep
in the Light World. Once you have found such a spot, warp back to the Dark
World. Press your B button and take note: You
can attack your enemies with an INVISIBLE SWORD!!
If all your hearts are full you can even shoot out beams like you normally
could with the Master Sword! Furthermore, you can even run with the Pegasus
Boots! And if that wasn't enough, as long as you go directly from shallow
water to deep water without touching land, you can RUN ON DEEP WATER! Now
you're just beginning to see the possibilities....
Be careful when you are in this "Super Bunny"
form, as there are many ways to lose your newly acquired powers if you
do any of the following: 1. Get hit by an enemy or an enemy's attack,
If any of the above occurs, you'll just be an
ordinary rabbit. To renew your abilities, just find water that is shallow
in the Dark World and deep in the Light
World, and warp back and forth. Feel free to explore around and see how
far you can get. You can even use the whirlpool off to the east to warp
up north. The music will also change when you do this! Now you're ready
to perform more glitches....
Glitch #3: Transport glitch
Once you've done the glitches above, you can prepare
to perform yet another glitch. If you still have the capability to walk
across deep water, find a spot that is close to land, and warp into the
Light World. Now get onto land and jump directly onto the warp location
you created. It is critical that you land directly onto it. You'll be back
in the Dark World as a swimming rabbit. Now go off the screen and onto
another screen while swimming in deep water. Get hit by an enemy and watch
what happens. You will slowly teleport back to the spot where you warped
from!
Normally, when you jump into water without Zora's
Filppers or while in the form of a rabbit, you are taken back to the last
piece of land that you touched. This glitch is in essence, an extension
of that property, but now you can warp to farther locations. A glitch results
when you are transported to another screen. The screen will scroll as far
as it can, but you will no longer coincide with your surroundings! If you
look at the map, you will see your "true" location, despite what you see
on the screen. Experiment around and see where you can travel. If you attempt
to scroll the screen in places where it normally cannot scroll, you'll
end up in a loop, scrolling for a long time! You may be looping for a short
time or it could even take several minutes! In some locations, the game
may freeze up and the music will go haywire and stay on one note. If this
happens, your game data may become corrupted. You'll need to hit Reset
and go back to the selection screen. If you're lucky (or unlucky depending
on how you look at it), one of your game slots may return to a previous
state! Keep trying the glitch and maybe (just maybe) you can restore that
long lost game slot that you were looking for!! Other side glitches that result
With a little ingenuity, you can use this glitch
to reach places that would normally require the hammer or the hookshot.
Examples of places you can reach with the glitch include the Village of
Outcasts, Skull Woods, and yes, even the Misery Mire! There are even some
places that "don't exist", which can only be reached by using this glitch,
including some of the "pits" in Death Mountain and on top of some rocks
that you normally cannot reach.
In the Village of Outcasts, you can still talk
to the people inside the shops and you can still talk to certain trees,
but you won't be able to play the mini-games! I haven't been able to get
into most of the dungeons yet in the form of a rabbit, but there are a
few that you can reach.
You can get into parts of the Skull Dungeon easily
by falling into the holes. But here's where it really gets weird: Let one
of the hands inside the dungeon grab you. You will return in Link's normal
form even though you don't have the Moon Pearl!! This effect will last
until you exit the dungeon. In another update, I may provide more detailed
methods for reaching such places (possibly even some photos) if you haven't
already figured them out. So in the mean time, have fun exploring around!
Gannon's Repeat
This Glitch is totally useless, but it is wierd
nonetheless. After defeating Gannon, instead of going to the room with
the triforce, fall of the edge of the floor. You'll now be in a room where
Sahasrala tells you to use the silver arrow on Gannon. When you go back
to where Gannon was killed, he'll be fully alive again, and you'll have
to beat him a second time.
Reach the Dark World Early!
1)Get to the first portal in the game and enter
it.
1)You'll be stuck in a waterfall
Otherwise, you can jump down the waterfall and
begin adventuring around.
Another way to regain Link's form without the Moon Pearl!
You can be as Link in the Dark World, without
the Moon Pearl, with only three limitations. It's quite simple, really.
All you have to do is lower your energy to 2 hearts, have a fairy in a
bottle and do the water-skating bunny trick. When above requirements are
met, just get hit by an enemy(most likely those flying mushrooms). You'll
die, but since you've got a fairy, you'll get revived. Not only that, you'll
be fully functional swimming Link! Now, the only thing that'll turn you
back to bunny, is either getting killed, entering a cave or a building
(meaning you'll stay as Link as long as you are inside a building or a
cave) and comming out of it or using the mirror. As a sidenote, who says
you've gotta have a Master Sword to use medalions? Using this glitch, you
can get Quake and it will still work with a level 1 sword!
Alternate way to reach the Magic Cape
You can get the magic cape without the titan's
mitt. It's as simple as cutting down a bush near that fence where there's
that big tomb in Light World, stepping inside the fence and using the mirror.
You'll be right next to the tomb, just ram it, step inside, grab the cape,
walk out, teleport back and that's it.
Get stuck in a wall
Go to the
Skull Woods dungeon. In the southeast corner there is a large room. Kill all
of the zombies in the room and pick up the skull that sits between the two
springs that are very close together. Charge your sword, then position Link
between the springs. Move him, and if you positioned him just right, he will
bounce back and forth all day until you press a vertical direction on the
control pad. Why do you need your sword charged? When (not if) a hand falls
from the ceiling, you can release the power to destroy it. After Link bounces
for about a minute, exit the room via the door in the northeast corner. Kill
the red jellyfish guy if you want to, but head for the western wall of this
room. You will notice something odd: You can see both the room you are in,
and the one to the west, at the same time. Head through the door that
connects these two rooms: The room you just exited will change into another
room as it scrolls off the right side of the screen. Link will teleport
through the room you would normally enter: Now he's stuck IN A DOOR on the
east wall of the room beyond the one you were trying to enter. You can't
move. There are only two ways out: Either wait for a hand to grab you, or use
your Magic Mirror.
Finish the game with only 11 Hearts!
*Start a new game. Rescue Zelda. When you get to the Sanctuary, DO NOT get
the Heart Container from the Treasure Chest.
*Beat the Eastern Palace and show Sahasrahla the Pendant of Courage so he can
give you the Pegasus Shoes.
*Get the Ice Rod (you'll need it later) and the Book of Mudora.
*Get the Power Glove from the Desert Palace, but DON'T go after the Pendant
there. Just leave the dungeon and get the Flippers, Magic Powder, and three
Bottles. You should go to the Waterfall of Wishing and throw in your
Boomerang and Fighter's Shield to get the Magical Boomerang and Red Shield.
*Go up to Death Mtn. and get the Moon Pearl from the Tower of Hera. Instead
of beating the dungeon and getting the Pendant, leave.
*This next part's important: Do the 'Reach the Dark World Early' trick you
can find on this web site.
*Careful, you only have four hearts, but you should have three Faeries in
bottles at this point (you're DEFINITELY gonna need 'em). Get down of the
cliff and jump in the river. Get back on land via the dock west of where the
Magic Shop is in the Light World. Get the Quake Medallion while you've got a
good chance.
*Beat the Palace of Darkness.
*Get the Flute, now is the best time to do so.
*Back in the Light World, go to the Lost Woods via the westernmost entrance
and go east and then exit through the opening in the trees you see there.
Pound down the stakes and enter the Dark World.
*Enter the Gargoyle Statue and get Titan's Mitt. Use the Magic Mirror and
exit.
*Rescue the frog and get your sword tempered. Get the fourth Magic Bottle
while you're at it.
*You should be able to beat Arrghus in the Swamp Palace now that you have a
tempered sword.
*Get the Bombos medallion, now is the perfect time.
*Beat the Skull Woods dungeon.
*Go back to the Gargoyle Statue and beat Blind the Thief.
*Get the Magic Cape. Buy Magic Medicine. Go to Death Mtn. Then get the Ether
Medallion. Go to the Dark World and get the Cane of Byrna. (In the cave with
spikes all over the floor. Use the Cape and dash with the Pegasus Boots and
you will not take any damage.)
*You should have no trouble with the rest of the game-- as long as you've got
lots of Magic Bottles with Faeries in them, you should be able to finish the
game with just 11 Heart Containers! I did this just last night! The fewest
Heart Containers I know of anyone else being able to beat the game with is 13!
Very challenging way to beat the game
If you guys like to make the game even more challenging,
here's my favorite way to beat the game:
- Beat the game without ever dying or saving (you'll get a 000 score)
You can also customize this further if you wish. For instance I did all the above
and skipped the Bombos spell and collected just 3 bottles instead of 4. The game can
be quite tedious later on in the game, especially in places like Turtle Rock without
having the Mirror shield. Beating the game with level 1 armor even with 20 hearts is
like betaing it with just 5 hearts on level 3 armor. So why did I beat the game like
this? Well, I wanted to see what the ending looked like this way. :-) It pretty much
did what I thought it would do, but oddly enough Link mysteriously gets a blue shield
in the end. If you're up for the challenge and have some spare time, good luck! Blue Enemies
Get the Ice Rod, and freeze an enemy with it. Stand
north of the enemy (but close), throw your boomerang north, then quickly pick
up the enemy before the boomerang returns. When the boomerang returns, the
enemy will fall out of your hands, and after a few seconds will start walking
around, except it's blue. And Link's hands will be frozen in the air!
Chickens in the Wall
Looking for a new, creative way to torture those
little chickens? Try this. You can blow the chickens right through the wall!
Here's how. Go to Kakariko Village in the light world and go to the house of
the old lady with the broom. Place a bomb next to the right wall, then throw
a chicken onto the bomb the second that it explodes. If all goes well, the
chicken will be blown right through the wall, and sometimes it will end up
inside the wall!
Neon-color Link
Get a fairy and keep her in a bottle. Get hit until
you only have half a heart left. Now go near one of the one-eyed giants, and
let him throw a bomb on you. Before it blows up cast the Ether spell. If
everything is OK then Link will die, but he will be strange colored, like when
he casts Ether. The Fairy will revive you and you will be strange colored until
you go in a building, die, or cast Ether.
Torch Glitch
If you stand to the left of a torch as close as
possible and try to light it with the Fire Rod, it will not light!
Shake items out of trees without Pegasus Boots
Just when you thought the only way to shake
items out of trees was to ram them with the Pegasus Boots,
strangely, you can also use the Quake Medallion to shake trees.
But be warned; doing this will shake ALL trees on the screen, so
look out if you reveal multiple swarms of bees!
Buy bombs as a rabbit
You can beat Agahnim with no Moon Pearl and go to the Pyramid of Power
as a rabbit, in which case you get to do another cool thing. First follow the
lengthy Lake Hylia procedure so that you're on the other side of the pink
stakes. Now go to the Bomb Shop (be sure you have the Rupees) and then buy
the bombs that the elephant-like creature is selling. Yep, just because
you're a rabbit doesn't mean you can't buy stuff! But, like before, the
programmers didn't expect a rabbit to shop from a store and so they didn't
program animation for a rabbit holding a purchased item over his head. So it
just floats there. But why buy bombs that a rabbit can't use? Well, you're
now... a SUPER BUNNY! Neat, but it expires when you leave the building, so it
has no strategic value.
Several glitches
The first 2 ones require that you play at maximum toughness level: use the
11 hearts trick to skip the desert and mountain palaces and 1st Agahnim and
take no Boomerang, Bottles, Bombos, Cape, Bug Catching Net, Cane of Byrna,
Magic Powder, Golden Sword, Red Mail or Blue Mail, lose your shield when
blue and do not take the mirror shield.
Glitch 1: Dark World to Light World glitch
Glitch 2: Snowman Link
Glitch 3: Ghost Bee
Glitch 4: Twisted Scene
Explanation of Chris Houlihan
You may have heard of the "secret room" in this game. You may have even
been there and gotten the Rupees. But did you realize that the way you
reach the room is through a glitch? There is a bug-checker in the game
that makes sure everything's OK when you enter a cave or something of the
sort. If it encounters an error, it sends you to this top-secret,
money-fillled chamber as a way to override the corrupt data. People have
been known to wind up in this room while entering the first Light World
palace, the pyramid (through the hole Ganon leaves), and while falling
into the hole covered by grass on the screen east of the graveyard (the
one that leads to a fairy fountain), in addition to the hole just east of
Hyrule Castle and possibly other spots.
There is a way to reach this room without relying on total luck (it's
probably easier to win the lottery than to enter the room by chance).
There are two methods I know of that work to this effect.
The first is to save and quit while in the Light World, then restart at
Sanctuary. From there, you are to dash as fast as possible to the hole
just east of Hyrule Castle. The odds of entering the room this way
aren't very good--I only succeeded once.
The other method seems to be much easier in my experience. Though I only
tried this method recently, I already succeeded twice on the same saved
file (dismissing rumors that it can only be done once per file). This
method doesn't require a save and quit. Go to Kakariko Village (Light
World, of course) and position Link on the path leading north out of the
village (easternmose exit). From this spot, dash as fast as possible to
the same hole.
On the way, you will have to go through a screen with a bunch of trees
and no great dashing room. You should enter this screen from the north
(naturally), preferably on the western side (it helps avoid the obstacles
there).
Also, it is NOT true that you must avoid getting hit, and it is NOT true
that you must reach the hole in a preset amound of time. You need to go
fast for it to work, however, but it does not have to be your best time.
I once got hit three times on the way and screwed up at one point, and I
STILL made it to the room! I'm not sure what conditions produce the bug
that sends you to the room, but speed alone doesn't get you there. My
best advice is to keep trying until you get there. Don't stop just
because you messed up--you still may be lucky in the end.
Chris Houlihan, by the way, is a kid who won Nintendo Power's contest to
get his name entered in the most secret room of a video game. I'll bet
he never anticipated that the room would be designed so that the only way
to get there is if something went wrong in the game! Return of "Get Stuck in a Wall"
The "Get Stuck in a Wall" glitch has side effects Nick Harvey
didn't realize. There's no end to the glitchy fun of the
Skull Dungeon! After you get to the room with the red monster and see
the other room through the door, walk up (past the first line of star
tiles) and hookshot upwards. Bomb the left wall (if you haven't
already) and walk through it. Congratulations, you've just entered the
Glitch Zone!
Some weird properties:
If you die but have a faerie, you'll be revived with seven hearts but
the faerie won't appear.
Since each room looks like one room but is really another, you'll
encounter all of the obstacles (except the monsters) of the room the
game thinks you're in, not the room that it looks like. At the same
time, you'll walk through some walls and all monsters you can see.
Your shield vanishes, except in room 8, and it comes back after you
leave the Glitch Zine.
The map always shows the room the game thinks you're in.
Whether you can see a door or not, you'll turn invisible at every door
you encounter.
All weapons except the Fire Rod, Sword, Bug Net and Hammer (at least
as far as I've seen) are invisible. Once again, they reappear when you
leave or enter room 8.
The Hookshot can't connect to anything.
Here are the eight rooms of the glitch dungeon I've discovered:
1. The room where you first notice the glitch. You'll start in a wall.
It looks like a room with a pot, where you can bomb the west doorway.
If it's already open, leave it that way. If not, turn around and bomb
the EAST wall (you can't see yourself, just don't move when you first
enter the room.) You can go east to room 2 (after bombing the wall),
or south to room 4.
2. This looks like the room with the Fire Rod. Actually, it's the room
with the star tiles. Walk north around the invisible trap, then east,
and follow the wall to the "switch". Head due south. You can go west
to room 4 or south to room 3. You can't go east, even though it looks
like there are two doors going that way.
3. You'll be in a wall again. Scroll to the right, then head left. You
may need to do this a couple of times. When you hear the hand come, go
up or down so it doesn't grab you. If lucky, you'll wrap over to the
east side of the room. Now you're in the room with the bumpers that
started the whole mess. Everything appears normal, but go north again
(don't even need to use the bumpers this time) and you can either go
back to the Glitch Zone or use the Get Stuck in a Wall glitch
mentioned before. Before wrapping, you can go back to room 2 by going
north.
4. Looks like Gidbos and Stalfos behind pots. Room 1 is technically to
the north, but since the REAL room requires you to push a statue onto
a switch to go north, and since there's no statue (invisible or
otherwise) you can't go that way without the Cane of Somaria. Going
south takes you out of the Glitch Zone and back to the Skull Woods
overworld, though not quite the same entrance you used to get in.
Going west (through the brambles) takes you to room 5. Despite the
appearance of a door and even though you may have come that way from
room 2, you can't go east.
5. Looks like the room that room 4 really is, and acts like the room
that room 4 appears to be. Heading east through the brambles takes you
back to room 4 (and may use a key if you didn't open a certain locked
door before.) You can't go north or west (despite the doors), and
south leads to room 6. Sometimes you can pick up an invisible pot in
the southwest corner. If you can, and you didn't get the key in the
"real" room 4 before, you can pick it up now.
6. Looks like pits on both sides. This room will be a PAIN if you
already got the Compass, since there will be pits everywhere but you
can't see them. You can get the Compass if you haven't already... but
don't. Heading north predictably takes you to room 5. If you can reach
the bottom, go right to reach fun fun fun room 7, or hunt for the door
on the left to reach the hilariously glitchy room 8.
7. WHEEEE!!!! Straight through the floor! There's no way out. You'll
just fall, reappear, fall, reappear, fall, reappear, fall, and keep
reappearing and falling until you die. Holding hard left will let you
survive sometimes, but it's only a delaying of the inevitable trip
through the floor. If there's a way to survive this room I'd like to
know, it could possibly lead to more glitch dungeon through the door
in the east (check the map, it's a real door.) You CAN use the
hookshot, but even if it could connect to something, there's nothing
for it to connect to.
8. Look familiar? You've now teleported to the Swamp Dungeon! Head
left a little, then back right to wrap the screen, just like room 3.
After wrapping, the properties of this room are FAIRLY normal (in that
walls are walls and you get your shield back) but you can still walk
through enemies, rocks, and other objects. There's no way out of this
room except the mirror, not through the two doors, not through the
secret passage that usually exists in that room, and not the way you
came in. And look at the map! The cursor doesn't even know where to
place you!
I haven't found any more interesting properties or rooms in the
Glitch Zone, but there could always be more! Leaving through the door
in the south of room 4, using the mirror, dying, or getting caught by
the hand will all get you trips back to the normal Skull Dungeon.
One more thing: standing on the east side of the room with the star
tiles, before you actually enter the Glitch Zone, lets you see the
room with the Fire Rod. Skull dungeon messed up again
Perform the bumper trick in Level 3 of the Dark World so that when you
head north the camera starts scrolling beyond its boundaries
horizontally. When these conditions are met, traveling through either
door on the left side usually causes a "double-scroll", sending Link to
the next gridsquare on the Map. When this happens, the effects are as
earlier stated by others. However, sometimes the game does something
different. Instead of a double-scroll, the game will occasionally only
scroll the rest of the room you're entering into view, then stop. It
looks initially as through the glitch was fixed, except the camera will
scroll beyond its bounds. When this happens, a whole new avenue of
exploration opens for business. I shall provide a walkthrough of one
such exploration I had with this variation.
1. I bumped my way into the glitch and walked north, as usual.
2. I entered the lower of the two doors going left (the one you would go
through to perform the original "Get Stuck in a Wall" glitch).
3. The game only scrolled the Fire Rod room into view and stopped. I
could move around with no ill effects, except for the camera scrolling
beyond bounds horizontally.
4. I went back east to the room I came from. That room scrolled into
view, and again the scrolling stopped. However, the "dummy" Link (the
one without a shield and such) was shown at the door. The real Link was
still back in the Fire Rod room.
5. By moving back and forth, I got the real Link back into view.
6. I tried again to go east. This tim, the double-scroll occurred. The
camera ended up showing the main entrance room (the one you start out in
after using the Fire Rod to open the final way into the dungeon). Link
(the real one) was in the room to the right.
7. I moved back and forth to scroll Link into view (the camera continued
to scroll at will). Link's movements were similar to that which you see
in Room #8 of the original Glitzh Zone exploration. (This is caused by
the fact that Link is on the "upper" of the two levels and the floor is
at the "lower" of the two.)
8. There's a bridge at the "upper" level in the middle of the room. The
side of a bridge holted Link's progress. I moved south, towards the
platform at the south end of the screen. Link jumped and disappeared
underneath the platform. I thn moved north, and he jumped again, onto
regular ground. Now things are back to normal, except of course for the
camera.
9. I headed west. Another double-scrool. Ultimately Link was back at
the Fire Rod room, but below the ground! I would walk freely between the
Fire Rod room and the room to its right without causing any room
scrolling. I could also walk underneath a "bottomless" pit and see Link
just fine. (Wow.)
10. I headed west at about the midway point between the rooms. Another
double-scrol. Now I'm underneath the wall north of the room with the
Gibdos and a way south and east (the latter of which is a key door). I
walk north far enough to get the room above fully shown. At this point,
the camera stopped scrolling vertically (I could only see the upper rooms
of the current ggridsquare), but it still scrolled nonstop horizontally.
(Yes, I'm still below ground.)
11. I go west. Double-scroll, but no new rooms load. I'm still
underneath the same pair of rooms, where I think you get the Big Key. I
keep trying to go west and east, but neither accomplish anyehing. I give
up and go south.
12. As I go south, the camera suddenly decides to go south with me (no
official room change or anything). However, at the borrom of the next
two rooms, the camera stops, and a regular room change occurs, loading in
the Compass room and the room to its left. The camera still scrolls at
will horizontally.
13. I move west at the south part of these two rooms in an attempt to get
to Room #8 of the previous glitch. However, the game continues to repeat
and will not load in any new rooms.
14. So, I go south. I end up at the second floor of the Tower of Hera
(the third Light World dungeon). As I walk south, Link jumps, and I
happened to be positioned versically just perfect to land in the pot that
takes you to the fairies of that dungeon.
15. While in the fairy room, the game still scrools at will, and I can
see a large, empty room to the left (though I can't get to it). I bring
up the Map, and it's...well...glitched. It still says "Level 3" and the
floors B1 and B2 are shown, but they aren't the floors shown. Instead, I
see floors 4F and 5F, which appear somewhat glitched (though the overall
floor shape does seem to corrolate to one of the other dungeons, the room
shapes don't synchronize). On the left, the hilite that indicates the
floors being viewed is flashing where the 4F and 5F icons would be shown,
but nothing's there.
16. I teleport out of the fairy room. I now explore a rather empty Tower
of Hera. No enemies to speak of. The pots are empty. If I pick up and
throw one, there's no breaking. The red tiles are down; the blue ones
are up. The camera STILL scrolls beyond its bounds horizontally,
although all I see is a repeat of the floor I'm on. I go downstairs all
the way to 1F, to the room where normally a bunch of floor tiles will
come up and attack. Nothing of the sort happens. I can pick up any of
the pots EXCEPT for the one covering the switch to open the door!
(Drat!) I head back upstairs, but I can't leave the dungeon because the
blue tiles are up and the crystal switches are all gone. I touch the
tile that lets you communicate with the elder, and that communication
goes fine with no apparent flaws.
17. I go up to 3F, and the enemies are gone. The door at left opens
automatically, and I hear the eight-note chime. (When I went down, I
fell through holes at the upper part of the dungeon, so I was never in
this room before.)
18. I go through the door at left. Double-scroll. (The camera never
stopped its glitched behavior.) THIS time, a new area was loaded. But
all I get is an empty room with walls on all four sides. Although I am
seeing the dummy Link, moving in any of the four possible directions is
impossible. I cannot scroll the camera to see what Link might be on (if
it's a similar wall or something else).
19. I am forced to use the Magic Mirror and warp back to the Dark World
level 3. (sniffle, sniffle)
This glitch is huge and has the potential to reveal all sorts of crazy
things. Had I not jumped into the Tower of Hera, I might've been able to
see much more than I got to see. Unfortunately, this exploration cannot
take place unless you can manage to keep a double-scroll from occurring
the first time you go through a door horizontally after performing the
glitch. This only happens on occasion (so far I only had it happen
twice, with several cracks at the bug). I don't know of any way to force
this to happen. But perhaps trial and error will be more than worth it.
Good luck! Gold walls
In dvdmth's version of "Get Stuck In A Wall", I discovered something. after
doing everything and you're in the room with the four walls with no way to move,
if you use the Ether Medallion, the walls will turn gold like that in Hyrule
Castle!
Beat the game early
Through the wonderfully awkward underworld exploration glitch I
encountered, it is possible to beat the game without ever facing Ganon.
1. Perform the glitch. (This is the hardest part.)
2. Head west until you reach the westernmost rooms of the dungeon.
3. Position Link at the top of the screen, but don't scroll north. (Be
careful--though you might not see it, the dreaded wall master can get you
here.)
4. Head west, through what should be a familiar tunnel from the early
parts of the game. Keep going through the swamp palace, the desert
palace, and eventually to Hyrule Castle itself. Stop when you reach the
throne room.
5. Go north. You'll first see the first screen of the "secret path" to
Sanctuary. Beyond that is the third floor of the Tower of Hera. (I
think I may have been here before...) Stop at this scene.
6. Go west. After the screen scrolls, move west until the opposite side
of this map sector is completely visible. Look familiar? This is where
Agahnim sent Zelda to the Dark World!
7. Move right a short distance so about half of the castle tower rooms is
offscreen. (May not be necessary.) Then go north.
8. Keep going north until the screen fades and the music changes...
9. Head north through Ganon's lair and declare victory!
I don't know if any side-effects occur if the glitch is performed before
one has genuine rights to face Ganon. In theory, combining this with the
Death Mountain descent glitch should enable you to beat the game with as
few as four hearts. Oh no, not another stuck in the wall glitch!
Enter the Tower of Hera and go upstairs. Scroll the room completely into
view, make sure the crystal switch is showing red, then fall down the
leftmost hole (preferably on the left side). Now, go straight to the
northwest end of the room and go downstairs WITHOUT ever letting the
camera catch up to Link. This will cause a split-screen effect on the
floor below.
Immediately go to the upper-right corner of the room and use your sword
to destroy any and all tiles that come up off the ground. When this is
done, the door may not automatically open, but it will if you scroll a
little more of the room into view. Whatever you to, do NOT scroll the
room ENTIRELY into view. Use a Bomb if need be to hit the crystal
switch, then go right through the door.
It looks like Link went into the next room, but he didn't. What you see
is that same dummy Link without a shield! Walk to the north wall and
feel around the center for an opening. You'll go upstairs to the second
floor. Now move back and forth until Link's true location is scrolled
into view.
Now you're in the same Glitch Zone as experienced in the Dark World level
3. If you go upstairs, then left through the door, you'll get stuck.
Same thing if you go back downstairs (the way you went earlier) then go
right. There isn't anything more you can do with this glitch, however. Phantom block
I was in Ganon's Tower, in a room on 1F with four chests in a square
shape, in which one chest has the Compass and makes pits appear when
it is opened. And a yellow transport square. Well I opened all the
chests and when I was ready to leave the room via the square, I
managed to push a block at the same time as I was stepping onto the
square. From then on, everywhere I went within the dungeon, through
holes, up stairs, down stairs, even through other transport squares,
there was an image of the block on every screen, in the same place
where the block I pushed was located. Link did not interact with the
block. I played through the dungeon as normal, all the way up to
Agahnim. In Agahnim's room, the block's color became glitchy. I
defeated Agahnim and the sequence with Ganon and the bat started and
when I was back on top of the pyramid, the phantom block was gone, but
when I jumped down the hole to fight Ganon, the block was there again!
I fought Ganon and when he started breaking the floor away, I got
knocked into one of the pits. Down there, the block's color messed up
again! I stepped outside and the block was gone. Then I experimented
by going in the room with the Pond of Happiness and the fat faerie,
and the block was there. When I went back to Ganon, I fought him and
beat him-- the block was on screen the whole time, and when I went
through the door after beating him and got to the Triforce, the block
was gone.
Pushing air
I was in the room on B5 of the Ice Palace with the big chest, and I
was pushing the lowest of the three movable blocks out of the way
while holding Up/Right on the pad (so I'd be moving in the right
direction after moving the block) and after Link finished moving the
block, his hands were still in the pushing animation, until exiting
the room.
Map of the underworld for the Skull Dungeon glitch
Click here for the map. Here is the map key, explaining
the symbols:
"@" sector boundary
Some explanation is warranted for the last two symbols. The first floor
of Hyrule Castle is broken into two pieces. The room that contains the
staircase to B1 is separated from the rest of the floor. This is due to
the presence of the throne room (2F), which was placed just north of the
lobby room because of the kind of staircase used to connect 1F and 2F.
As a result, the room with the staircase to B1 is displaced and can be
found four sectors to the north of where one would ordinarily think it
would be. Thus, I had to show the doors connecting this room to the
remainder of the castle in a different way. I showed the map sector with
the staircase to B1 like this:
Also, one of the sectors of the Ice Palace is represented twice on the
map. This map sector holds the easternmost room of B6 as well as the
secret fairy room of the level. The sector looks like this:
Ganon's lair is at the upper-left corner of the map for two reasons: 91)
it is a natural "goal" location, so putting it here allows it to stand
out, and (2) its row has no passages leading north, and its column has no
passages leading west.
The exact location of the boss room of the Ice Palace (B5) is unknown at
the present time. Since I only have a completed game to work with, I
cannot twll which of the empty Ice Palace room sectors holds the boss
lair (since tthere's nothing that can be distinguished about it). From Skull Dungeon to Hyrule Castle
Using the Skull Duneon glitch to explore the underworld of Hyrule, you
can access Hyrule Caslte and exploit some strange oddities there. To
gget into Hyrule Castle, do the glitch, then head west along the top of
the screen until you reach the first Hyrule Castle scene you come across.
(It will be right after a scene from the Desert Palace.) After
scrolling the screen all the way to the left side, move Link back and
forth to adjust the camera, then walk underneath the staircase connecting
the two parts of the room. Link should appear on the staircase and walk
down it, thus entering the normal room.
While here (and frankly, just about anywhere else you can reach with the
Skull Dungeon glitch), Link can walk right through enemies without
getting hurt, but he cannot hurt the enemies either. As you go through a
door, Link temporarily disappears. Also, some items are useless, such as
the lamp. However, since most of Hyrule Castle's rooms are two screens
wide, the camera will act normal for most of your stay here, making it
easier to move around.
Go upstairs to the throne room, and the symbol "1F" will appear even
though the throne room is actually on 2F. This is because the game
thinks you were in the first basement (sinch most of Skull Dungeon is on
B1). Going up or down the stairs will increment/decrement the floor
count, which is why you ended up on 1F. Once you are considered to be on
1F, take a look at the map. The highlight on the left side will be on 1F
and B1, but the 1F symbol is gone (since Skull Dungeon doesn't exist on
that floor). On the right side of the screen, you see the Skull
Dungeon's B1 on the bottom, but on top, you see the symbol "1F" but the
map instead shows the lowest floor of the Ice Palace! (If you manage to
make it to higher floors in other areas of the underworld, you'll realize
that the higher you go, the farther up through the Ice Palace you can see
on the map.)
Now leave the Map screen and take a look at your lovely throne.
Nothing's there to block the path to the north! You can now go north and
begin working your way to Sanctuary, as if you were escaping with
Princess Zelda. After you go through this door, look at the map again.
Now the phrase "Level 5" appears in the upper-left corner and you can
scroll through the floors of the Ice Palace. You are considered on 1F of
this dungeon (naturally). The reason why this dungeon's map is displayed
now instead of Level 3 is because when you travel through this door in
the normal game, the map is switched from Hyrule Castle to the pathway to
Sanctuary.
When you make it through to the room just before Sanctuary, you'll notice
one minor problem--the levers are gone! There's no way to open the door
and go forward! However, there's still a way to get to Sanctuary. Head
back downstairs, then push the block that can be moved to the south.
While it's moving, you should be able to walk over it (you may have to
try more than once to get through). Now head west through the lower of
the two doors that are opened by bombing or dashing into them. Once
you're in the next room, head back east and the screen will scroll, but
Link will still be back in the room you just tried to leave. (Move back
and forth to see him if you want.) Head east through the same door a
second time, and you'll warp straight to Sanctuary.
Exit Sanctuary, and you'll seem to be outside in the Light World, but the
Dark World music will play. Scrolling the screen to a new area causes
the Dark World to load in, but its graphics still look like the Light
World. Bringing up the Map fixes some of them, but to get everything
back to normal, you must either use the mirror or go back into a cave or
house (or whatever).
Meanwhile, back at the castle, there is another interesting thing you can
do. Instead of going up to the throne room and beyond, exit the castle
(preferably through one of the two side entrances). You'll be outside in
the Light World but hear the Dark World music (again). Scrolling the
screen will naturally load the Dark World into view, as before. After
you come out of the castle, you can choose to do one of the following:
* Go back in the castle (to explore it in its normal environment). This
way, you can revisit the castle even after beating Agahnim the Wizard.
* Walk underneath the gate in front of the castle. If you beat
Agahnim,the screen will fade out as if to warp you to the Dark World, but
instead the same exact screen fades back into view. The game responds by
triggering another fade-out, this time loading the Dark World, as normal.
(Things are back to the way they should be at this point.)
* Aftering exiting one of the side doors, jump down off the castle walls
(lower-right corner), then head west and go down the path leading to the
next screen. The Dark World will load, but there's no path there!
Instead, you end up in water and will start swimming. Head back east,
and you can walk across the sky above the Pyramid of Power, though its
graphics will be totally messed up (to fix this, use the Magic Miror).
CAUTION: Be very careful where you scroll the screen, because the
loop-scrolling bug can be triggered from here. Cane of Somaria glitches
The Cane of Somaria is a very mysterious cane indeed. Here are some
strange things you can do with it.
* Create a block along the southern wall of a dungeon (or wherever).
Then, dash into it from above. It should bounce into the air, and if
you're lucky it will land inside the wall. You may or may not be able to
reach it to pick it up.
* Find a room with a staircase connecting the upper and lower sections of
the room. Make a block on the upper level, then push it over the stairs.
Link should climb down the stairs underneath the block. It's now
floating in mid-air.
* At the same location, create a block at the top of the stairs, then
dash into it so that it bounces over the staircase. Depending on the
layout of the room, the block may end up landing seemingly on the lower
level of the room. However, it's actually in mid-air, and you can walk
right underneath it. (Note: This does not happen if you pick up and
throw the block; it only happens if you dash into it.)
* By repeatedly picking up and throwing a block, it's possible to take it
into a doorway. First, pick up the block, stand facing the door, and
throw it. Run into the door, then turn around and get just close enough
to the block so that you can pick it up again. Face the side of the
doorway (e.g. if the door is a horizontal door, you would face up or
down) and then throw the block. Before it lands, move farther into the
door, then repeat the process until you're satisfied with how far you've
gone (making sure you don't scroll the screen accidentally). After
throwing the block for the last time, don'e press any directions on the
control pad. Press Y to eliminate the block, then start using other
items (sword, boomerang, the Quake medallion, whatever you like).
Normally you can't use items while in doorways, but if you take a Somaria
block into the doorway, you can. (Note: Once you move, you will lose
this newly earned ability.) Run in place
Find a doorway (indoors) that leads north or south to another room. Move
partially into i, then press Left or Right. (Link will start walking
out.) The moment Link is completely out of the door, start holding
diagonally towards the door. If done right, Link will face the door and
start running in one place until you let go of one of the two directions.
(This does NOT work in a horizontal door.)
Bypass the star tiles!
With this handy trick, you can get past star tiles
without ever activating them! All you need is one bomb to make this work. Just
stand close to the star tile, then face away from it. Set a bomb and stand
still. The explosion from your bomb will send Link over the star tile without
activating it! Link will take damage, but you can get past a small pits and
star tiles this way. Try this in Skull Dungeon along with some previous
glitches for the next result....
Beat the game with just 4 hearts!
In order to beat the game with just 4 hearts, you will
need to successfully use the "Reach the Dark World Early" glitch, then perform
the Skull Dungeon glitch to mess up the screen, and finally perform the previous
glitch to bypass the star tiles. Beating the game now is literally as cheap as
just walking into the Triforce room! Doing so will ultimately lead to the absolute
minimalist quest. The bare essentials are as follows:
4 hearts
Now, here's a brief walkthrough:
1. Collect the Lantern and rescue Zelda. Note that you will not need to ever
pick up the Boomerang. Be sure to skip the Heart that the Sage offers.
2. Conquer Eastern Palace, picking up the Bow & Arrows. You will most likely
collect a Bomb at some point.
3. Get the Pegasus Shoes from Sahasrahla, then use it to get the Book of
Mudora.
4. Enter the Desert Palace, grab a key in order to reach the Big Key, and
collect the Power Glove. Exit the Palace without beating it.
5. Pick up the big rock blocking access to Death Mountain, enter, and get the
Magic Mirror.
6. Perform the "Reach the Dark World Early" glitch.
7. Let a Pikit eat your shield in Skull Woods (optional).
8. Fall into Skull Dungeon via the southeastern-most hole and let a hand grab
Link to retain his original form.
9. Perform the glitch, causing the rooms to no longer scroll properly, and use
the glitch to bypass the star tiles.
10. Keep heading north of the Throne Room until you cannot safely walk further,
then head west to reach Ganon's final room. Just walk north and watch the ending.
:-) Bunny Link in the Light World!
In order to get Link to be stuck in his bunny form in
the Light World, you'll first have to reach Skull Woods without picking up the
Moon Pearl by using the "Reach the Dark World Early" glitch way above. Then
allow a hand to grab Link so that he regains his normal form. Then execute
the glitch which allows you to explore underneath the dungeon. The trick is to
find the cave which exits back into Kakariko Village. Exit that cave and you'll
be back in the Light World as a bunny! What is even weirder is that you will be
stuck this way until you either die or reach the Dark World. As long as you
never bought the Bottle in Kakariko Village before, you can buy it as a bunny.
This will give you the abilities of the "Super Bunny" from my "Restore data"
glitch! Now you can finally explore the vast land of Hyrule as the Super Bunny!
As long as you don't get hit or crash into anything, you can pick up the large
rock blocking the entrance to Death Mountain and finally reach the warp tile.
Warping into the Dark World and back into the Light World will regain Link's
normal form. Hitting Reset or dying or saving is much quicker, of course. :-)
Looney Toons B-Ball
Get stuck
I found this glitch on Looney B-Ball (not a big glitch):
When I was dunking 2 shots(incorrectly), all of a sudden, the screen
moved to the left or right end.
NOTE: If you're NOT careful, you may get stuck(not freeze) forever
until the timer runs out! Lufia 2 / Estpolis 2
Various glitches
- You can take items into the Ancient Cave that
you never got anywhere in the game, and even keep them when you leave.
This is actually quite helpful.
- Selan's name once changed to "eSlan" in the
Ancient Cave.
- I got a fifth set of Dragon Eggs. The Egg Dragon
wouldn't take them, but it now says I bought "99" eggs in the report at
the end of the game.
- Go to the Config screen and go down to Music.
Push right to select mono, then hit left and your item list will appear.
To switch back to stereo, use the A button.
- Go to the Config screen and go down to Music.
Push left twice, then keep hitting A and the game will reset.
- Get the item screen to appear on the Config
sscreen (see above). Then cancel out of the menu with B until you get back
to the main game (field) screen and you may be at Level 0 and have 0 HP.
Save the game and reset it. You now have 999 of every stat! For some reason,
the game takes much longer to load and save.
- In the Divine Shrine, there's a room with a
lot of pots where you have to pick up one of the pots to make the spikes
go down. If you stand where the spikes are (when they're down) and walk
into the wall, you will start walking around in the walls, but you can't
go down the stairs or leave the room, so you have to cast Escape and leave
the dungeon. In other words, don't do it.
- A similar glitch happened to me in the third
Mystic Stone room. This was very annoying because I had to reset the game
and do Daos's Shrine all over again.
- You can get a "nameless spell" in the Ancient
Cave. This spell has no name and can't be cast. Thanks to Bandichar@aol.com
for discovering this glitch.
- And, of course, the ultimate glitch, the Submarine
Shrine. Actually, I'm not sure if this IS a glitch. I can't believe they'd
overlook it. B99 of the Ancient Cave is similarly glitched. Transformer Pots
This trick requires an enemy, and a pot. Pick
up the pot, and stay several spaces away from the enemy. drop and pick
up the pot, and make it so the enemy will move in front of you next move.
Drop the pot. The enemy should 'merge' with the pot. Maxim will go in to
battle. Escape. Lift the pot, and the enemy should spin in a circle. The
enemy will transform into a strange creature, but the battle will go normal.
A special transformation that should be noted-
Walking on Sunshine...
Not quite, but actually space! In the chamber
where Maxim fights Erim, I can't quite point it out, but there are two
spaces on the edge of the floor that let you walk out in to the open area.
Just try to walk off the edge of every panel!
There is a hole in the lake directly Southwest
of Parcelyte, accessible by the Sub Excercion. In this hole are the whirlpools
lading to caves which all have the same strange name- I am not able to
tupe it out. Without the crunches [thats what I call glitches] they're
names are. U e MoV T Cave
sent in by rusty axe
sent in by Cl0vis15
sent in by Jay
sent in by Cactuar
sent in by Cactuar
sent in by Cactuar
sent in by Cactuar
sent in by Cactuar
sent in by Cactuar
sent in by Cactuar
/-------/   /=wall
/ #   # /   -=top/bottom of screen
/!      /   #=statue
/!#   # /   !=where you should go
/-------/
I just wanted to make sure where you can go. You can
save a lot of time with this trick. One other note, to
skip the last 2 statues, run up the door, don't walk.
sent in by The Glitch Reaper
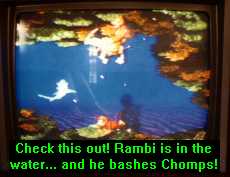
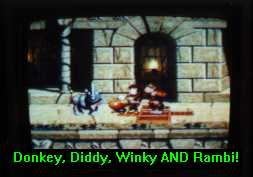
by David Wonn (1996)
![]()
Want to see more photos?
Here's a letter from NOA regarding the complex
glitch. :)
sent in by Chris Estes
by David Wonn
sent in by Ryan Murray
[Ed. note: To do this easily with two characters,
go to Funky's Flights so that you appear as one plane.]
sent in by Ryan Murray
sent in by Nicholas Harvey
sent in by Nicholas Harvey
sent in by Victreebel64
sent in by Victreebel64
sent in by Jon Barber
Photo 1
Photo 2
sent in by Nicholas Harvey
[Ed. note: This level is one of the first stages
where I came across the "splitting" trick. An easier alternative to this is
to exit the stage with Start and Select just after your first character falls
into a pit. This easily allows you to reduce your lives below zero.]
sent in by Nicholas Harvey
sent in by Baltzar Ralvén
by David Wonn
sent in by Rheana Armstrong
sent in by glitcher
Note: If you miscalculated the jump onto the oil drum, youll either fall
through the floor or get stuck against the hidden entrance.
sent in by William Knipper
sent in by no1wammy
[Ed. note: Simply pausing and unpasuing will
undo the frozen screen and resume scrolling.]
sent in by Nicholas Harvey
sent in by no1wammy
sent in by no1wammy
sent in by Curtis Armstrong
sent in by Green Guyyy
Turn Diddy into Klubba!!
by David Wonn
sent in by Karri Billing
See photos
sent in by Karri Billing
See photo
sent in by Karri Billing
See photos
sent in by Karri Billing
See photo
sent in by Espeon25
sent in by no1wammy
sent in by Glitch Masta Buzda
sent in by Glitch Masta Buzda
sent in by John Vertical
sent in by Michelle & Charlie Dawson
sent in by Glitch Masta Buzda
sent in by Nick F.
sent in by Onevidkid
sent in by Onevidkid
Go to the level "Konveyor Rope Klash" in Kaos Kore. Make your way through the
level where the 2 Knockas are (They're after the Booty Bird that has the
letter [N]). Grab one Knocka and throw it into the other while the other
Knocka isn't moving. His teeth will turn green!!
Go to the level "Creepy Caverns" (the one after the above one). Find Squitter
and go through the level until you see a Knocka (The green barrel kremling
that pushes you around). Shoot webs at him and his teeth turn green!! Here
are 2 screenshots of it.
Pic 1 Pic 2
This is pretty cool to do if your bored.
sent in by Onevidkid
sent in by John Vertical
sent in by John Vertical
sent in by John Vertical
sent in by Ben.C
sent in by Cactuar
sent in by Flying Omelette
sent in by Flying Omelette
sent in by Flying Omelette
sent in by Nicholas Harvey
sent in by Phil Bruni
Sabin
Cyan
Relm
and if it STILL doesn't work then don't kill
any one in the round AND IF IT STILL DOESN'T WORK make sure you're doing
EVERYTHING right.
sent in by Cl0vis15
sent in by Cl0vis15
sent in by Curtis Stephens
sent in by McNeill
sent in by Wisniewski
sent in by The Shadow
sent in by D-Bone
sent in by Cl0vis15
sent in by Glenn Guardia
Step 2: Go to the chicken coop and select a chicken, then place it into the
livestock-selling area.
Step 3: Go into town and go to the livestock dealer.
Step 4: First tell him that you would like to sell a chicken.
Step 5: THEN, tell him that you would like to buy a cow. IF YOU CAN'T BUY
A COW, THIS TRICK DOESN'T WORK. If you can, he'll say that he'll deliver it
to your ranch, and that should secure the glitch as long as you've put the
chicken INSIDE THE LIVESTOCK-SELLING AREA before you left the ranch.
Step 6: Go back to the ranch.
sent in by Cl0vis15
sent in by Cl0vis15
sent in by Daniel Wisniewski
sent in by Daniel Wisniewski
sent in by Nicholas Nordby
sent in by Nicholas Harvey
sent in by Cl0vis15
*SEVERE BUG!*
Restore erased game data... and other oddities!
by David Wonn
First of all, this glitch involves game data
corruption, so the results may be a bit unpredictable. I strongly
advise that if you don't want to lose data in a particular game slot, you
should save a second time in that slot to prevent it from being corrupted.
Better yet, just don't do it at all if you don't back up your data. :)
Based on my observations of performing the glitch
numerous times, it appears that some of your data from previous saves are
stored in a temporary memory location. For some reason, the glitch causes
the game to terminate unexpectedly, and due to some programming flaws,
it accesses some data in a temporary memory location and writes it over
your current data. In essence, you may be able to restore previous game
data. I cannot tell you why the glitch works the way it does, since I do
not have any means of accessing the programming code.
If you know which game slot you want to restore,
DO NOT EVER save anything on that slot, or you will lose any possible
chance of getting your data back. Use a different slot to perform the trick.
For instance, let's say one of your friends "accidentally" erased one of
your games that you worked so hard to achieve. Let's say this was in slot
1. You will need to use slot 2 or 3 to attempt to get your data back that
was in slot 1.
Once you've set everything up as above, you will
now be ready to perform the glitch. Note that you normally will not be
able to attack your enemies in the form of a rabbit. Your item usage will
be quite limited, so you'll need to sneak past your enemies. Get down off
of the temple and head east (to the right). Now head south as far as you
can until you see the screen where there are nine stakes that you'd normally
pound into the ground. Now head east (right) as far as you can and head
south. You will be at a screen where you can see Lake Hylia and a glimpse
of the Ice Temple to the southwest. There is also a dock where you'd normally
be able to reach land from the water. Normally Link cannot swim as a rabbit,
but there is a nifty glitch that will allow you to do so...
2. Charge into a wall or fall off a platform,
3. Land onto a dock, or
4. Touch land and then go back into deep water,
or vice-versa
sent in by Cl0vis15
sent in by Lauri Virkkunen
initially posted on Zelda Headquarters
2)Drop down the ledge.
3)Walk to the dead end.
4)Now here's the thing. Use the mirror to teleport
to the Light World.
5)While in here, your task is to move slightly
closer to the bridge so that you're not touching the left edge of the teleportation
"X".
6)If you do it correctly, you'll teleport back
to the Dark World but you won't be sent back. You're actually a tad closer
to the edge. Don't move or you'll have to do it all over again.
7)From here, teleport back to the Light World.
Now, move as far as you can to the right so that you're still on the teleportation
"X". (When I first did this trick, Link's butt was the only thing on the
teleportation "X" and he still got teleported)
8)If you did it correctly, you'll appear right
on top of the edge and you won't be teleported back. Simply jump over the
edge to the lava.
9)From here, you'll have to be careful where
you walk. If you try to change the screen from the wrong place, either
one of these will occur:
2)You'll activate the loop-scrolling bug.
sent in by Lauri Virkkunen
sent in by Lauri Virkkunen
sent in by Nicholas Harvey
sent in by Nicholas Harvey
by David Wonn
- Never upgrade the sword beyond level 2 (Master sword)
- Lose your shield (i.e. never collect the Mirror shield)
- Never upgrade the boomerang
- Use level 1 armor (green tunic)
- Never upgrade your magic meter (don't get the ½ upgrade)
sent in by Victreebel64
sent in by Victreebel64
sent in by Victreebel64
sent in by Kyle Wightman
sent in by Kyle Wightman
sent in by Nicholas Harvey
sent in by John Vertical
Go to any palace in Dark World, before beating Agahnimin Ganon's tower. Die.
(this is very easy) Choose Save and Continue.
You'll notice that the bottles are Light World style! Go out and you'll have
the Light World music playing, unless you are on Death Mountain, you'll have
the standard Dark World music. If you look at the map, you won't have any
crystal map locations, and if you use the Mirror, you'll teleport at the
point you are standing on, but go nowhere. But the map and the music will be
back to normal, and all enemies you have killed will reappear!
If you go to another screen when with the misplaced music, you'll end up in
Light World!! The outlook(the walls, the trees, the fences etc) will still
be like in Dark World, but the structure will be the same as in Light World.
If you now look at the map, when you return, the trees, piers etc. will be
back to normal Light Worldish, but the colours will still be Dark Worldish.
This lasts as long as you either go to Dark World or go inside a building.
With the 11 hearts/minimum items go and beat the Tower of Ganon after you
have at least once died inside. When Agahnim comes out, he will act like
he's the 1st Agahnim. His palette will be screwed(watch him shrink into the
black blob or cast a lightning) and when you kill him, you both will
disappear, you will hear the whistle, and you will be teleported to the
pyramid. The Ganon-bat will make the hole, you will fly in along the bird,
and you will be back to normal, but with the music glitch described above
and a black sword! Now go off the screen, you'll end up in Light World, go
to a teleport, and you'll be plain white! The enemies will also go plain
whilte if you hit them.
Now go to the pyramid faery and throw something in, you'll get back to
normal, but with a black suit! It'll go back to green if you leave the room.
If you kill an enemy and free a bee from a bush at the same moment(with a
swirl attack), the bee will disappear but not its shadow. Weird.
Go to a top corner of the pyramid, press hard up and left/right(against a
wall) and use the mirror. The scene of the mountains will get pretty twisty.
sent in by dvdmth
sent in by Jason Godding
sent in by dvdmth
sent in by GameQueen
sent in by dvdmth
sent in by dvdmth
sent in by Nicholas Harvey
sent in by Nicholas Harvey
sent in by dvdmth
"|" vertical wall inside a sector
"-" horizontal wall inside a sector
"+" corner
":" Door or bombed passage
"=" Entrance from outside (at bottom of sector)
"}" Door on right side of sector that leads to a different map location
(see below)
"{" Door on left side of sector that leads to a different map location
(see below)
@@@@@@@@@
{hF1 hF1}
@-------@
@       @
@@@@@@@@@
I used curly brackets to function as "arrows" pointing in the direction
you are traveling as you go through the door. I placed similar curly
brackets on the main portion of the map of Hyrule Castle in a similar
manner.
@@@@@@@@@
@   |5FF@
@---+---@
:5B6|   @
@@@@@@@@@
This sector appears in a second location, completely separate from the
rest of B6. I know that it is a duplicate and that I didn't make a wrong
turn because the keydoor on the left side of the room was still locked in
the duplicate sector, even though I had previously unlocked it in the
actual game. Going west from that room led to a completely different
part of the Ice Palace. Thus, I mapped this odd sector as shown below:
@@@@@@@@@
@   |5FX@
@---+---@
{5XX|   @
@@@@@@@@@
I used a curly bracket because that door doesn't lead naturally to the
next room. (I traditionally use "X"s whenever I map glitchedareas to
indicate a "non-real" or "fake" room that imitates another that is real
and part of the game. I did this when I mapped out Zelda 4 and other
games.)
sent in by dvdmth
sent in by dvdmth
sent in by dvdmth
by David Wonn
by David Wonn
Green Tunic (Level 1)
Fighter's sword (Level 1)
Pegasus shoes
Power glove (Lift 2)
Pendant of Courage
Bow & arrows
Bombs
Lamp
Book of Mudora
Magic Mirror
by David Wonn
sent in by Rapidkirby3K
sent in by squarewyvern
sent in by Skysplitter the Sword
Use this trick on a Baby Frog, and the Baby Frog
will transform in to Erim!
sent in by Skysplitter the Sword
There are many more to come so stay
tuned!
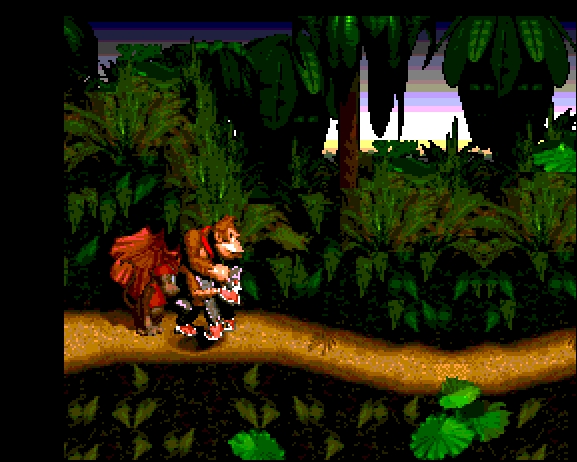